 NS+
**
NS+
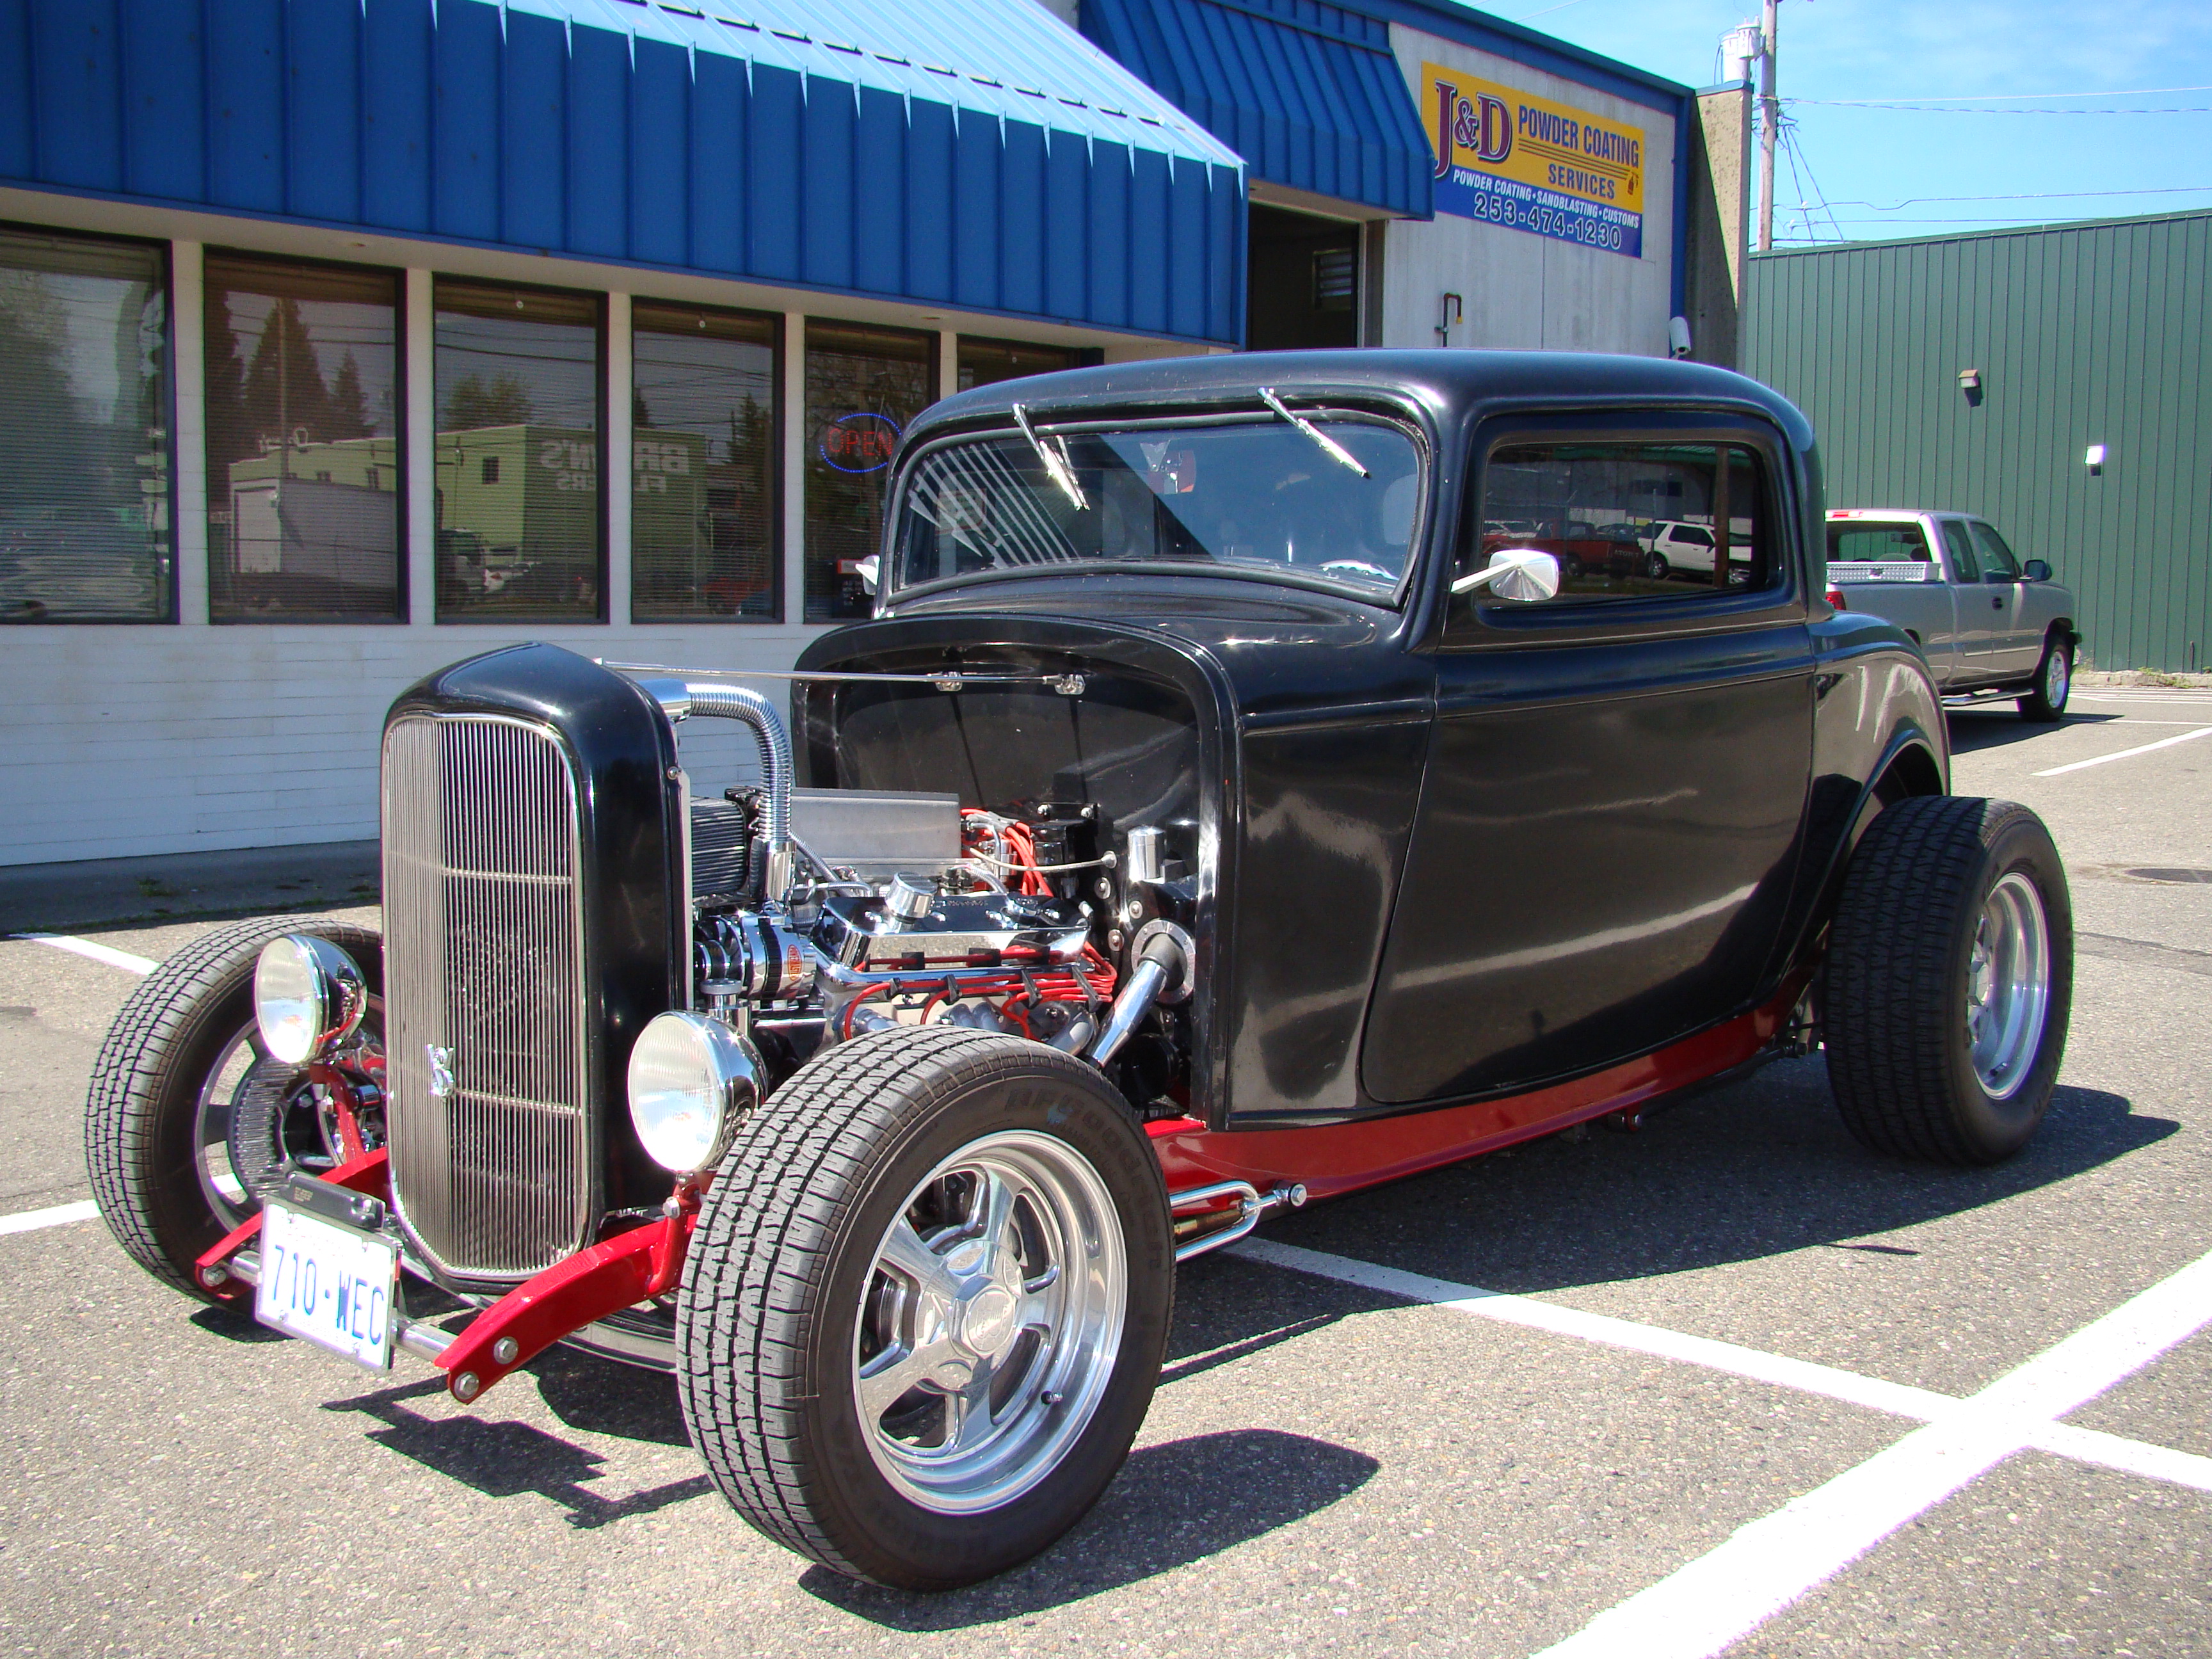
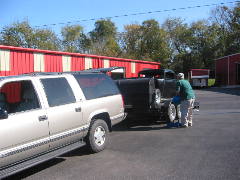
**J & D Aero Inc.
NS+
**
 |
 |
 |
||||||||||||||||||||||||||||||||||||||||||||||||||||||||||||||||||||||||||||||||||||||||||||||||||||||||||||||||||||||||||||||||||||||||||||||||||||||||||||||||||||||||||||||||||||||||||||||||||||||||||||||||||||||||||||||||||||||||||||||||||||||||||||||||||||||||||||||||||||||||||||||||||||||||||||||||||||||||||||||||||||||||||||||||||||||||||||||||||||||||
 |
 |
 |
|||||||||||||||||||||||||||||||||||||||||||||||||||||||||||||||||||||||||||||||||||||||||||||||||||||||||||||||||||||||||||||||||||||||||||||||||||||||||||||||||||||||||||||||||||||||||||||||||||||||||||||||||||||||||||||||||||||||||||||||||||||||||||||||||||||||||||||||||||||||||||||||||||||||||||||||||||||||||||||||||||||||||||||||||||||||||||||||||||||
|
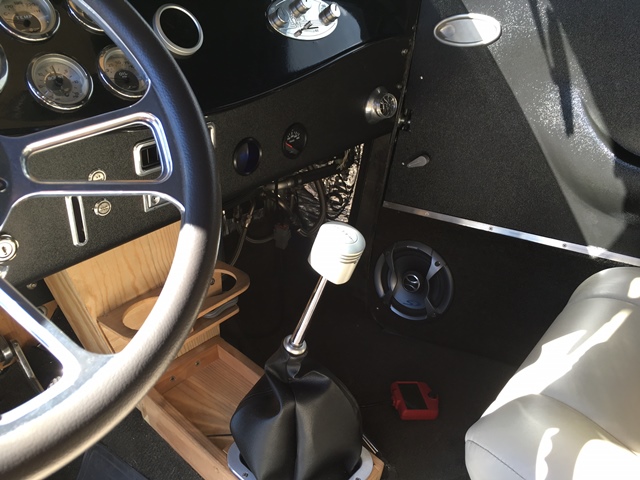
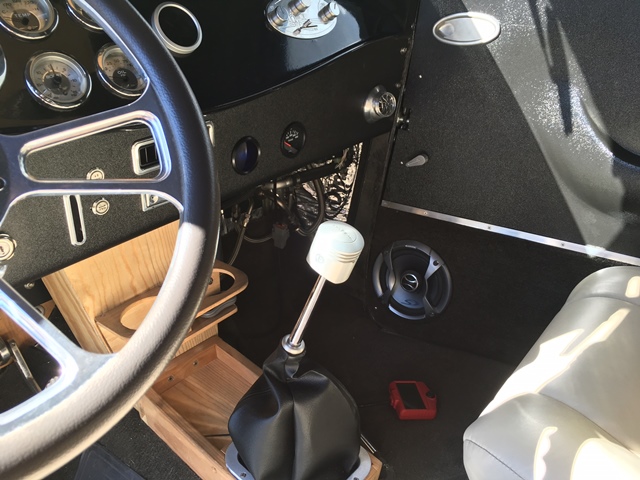
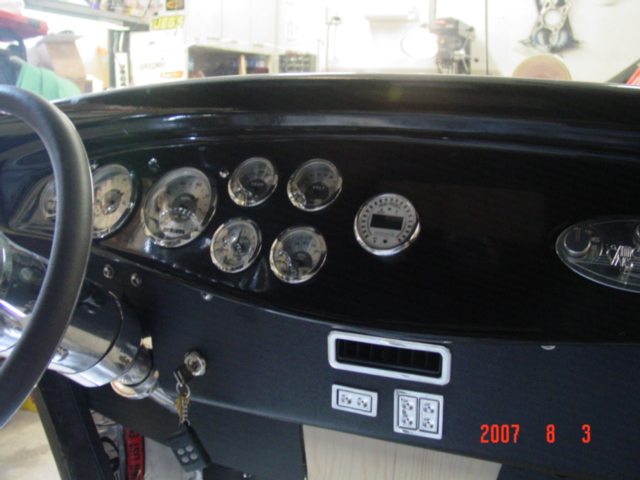
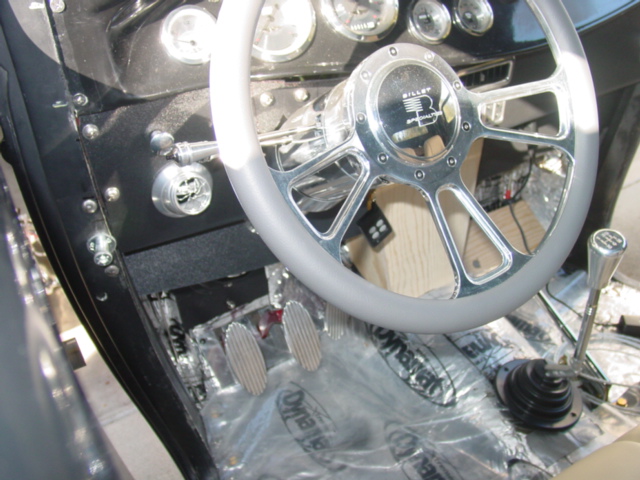
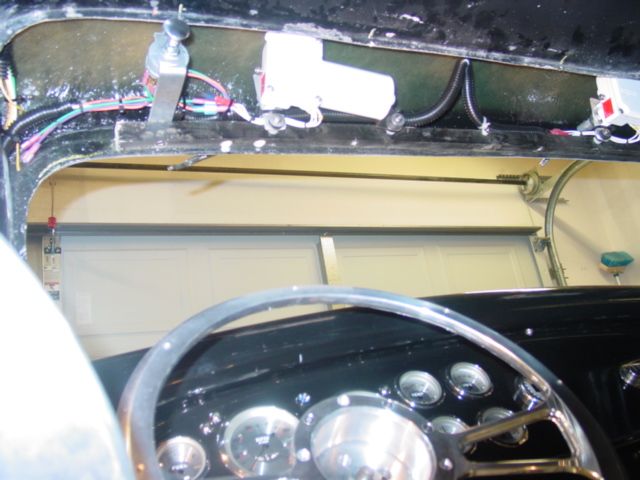
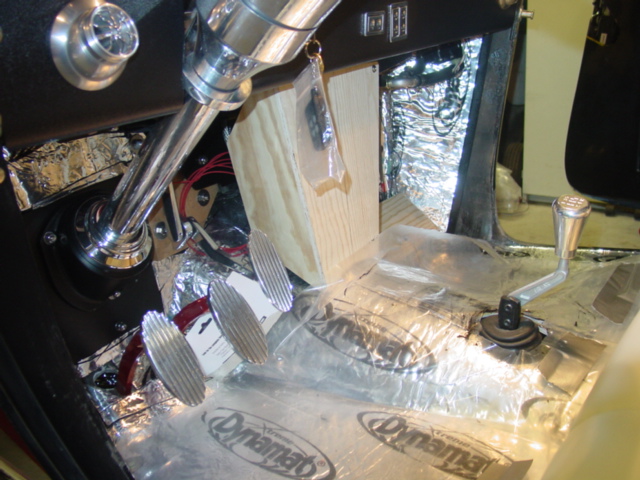
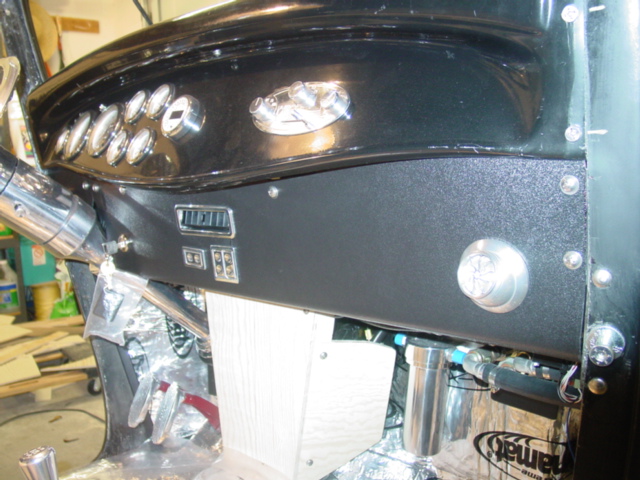
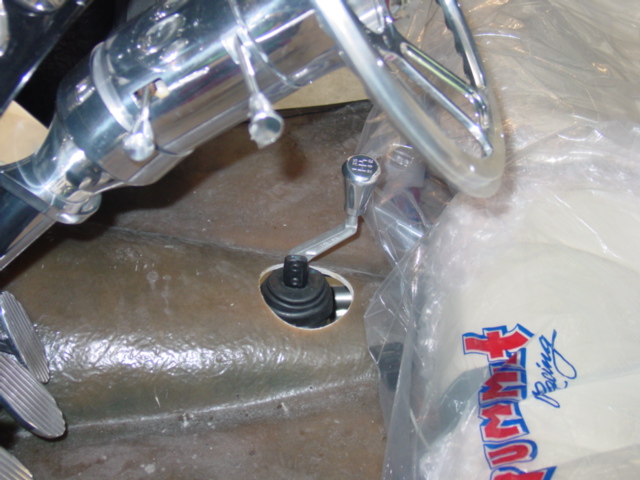
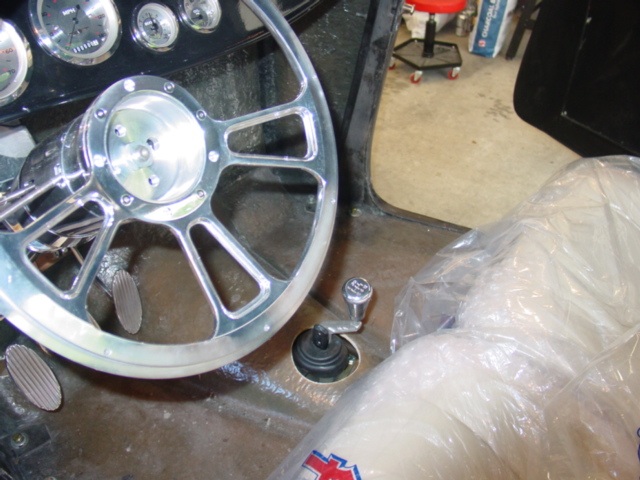
Nwe A/F gauge is in place, and another new addition
to the lower dash the Trans Temp & Pressure gauges. The Auto Trans shift lever with boot, Gear shift indicator, Trans A/B program and T/C Lockup switches are installed. As show in the Left picture, the lower forward LH & RH trim panels are not installed in this shot. |
|||||||||||||||||||||||||||||||||||||||||||||||||||||||||||||||||||||||||||||||||||||||||||||||||||||||||||||||||||||||||||||||||||||||||||||||||||||||||||||||||||||||||||||||||||||||||||||||||||||||||||||||||||||||||||||||||||||||||||||||||||||||||||||||||||||||||||||||||||||||||||||||||||||||||||||||||||||||||||||||||||||||||||||||||||||||||||||||||||
 |
 |
 |
||||||||||||||
|
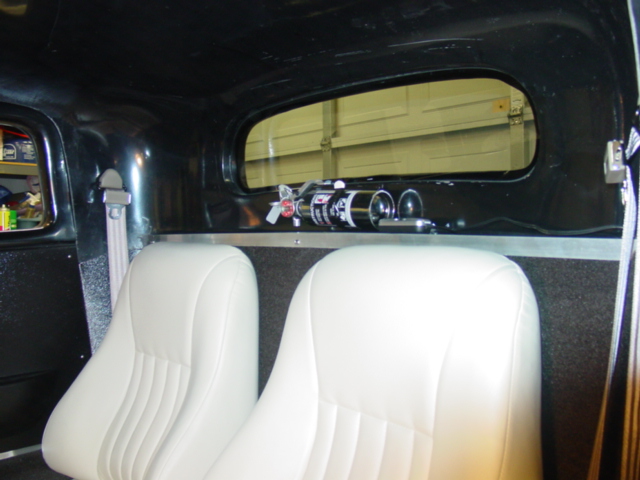
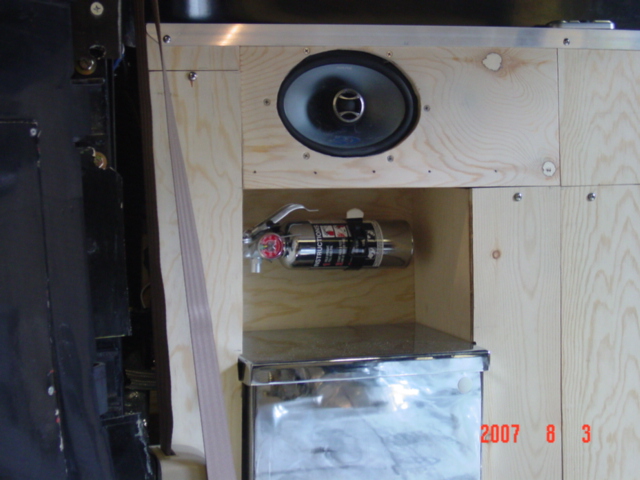
Here is a shot of the newly
covered rear panel area, behind the seats. (Note: The pictures above on the left and right, shows the seats in pretty much their actual cream color) Also the Fire Extinguisher is now relocated up on the rear deck area, this location allows for quicker access. (just in case) I also reworked the seat belt's floor attach points. (between the seats / center picture) They now provide a little more clearance, and a much better angle when your bucked in! |
||||||||||||||||
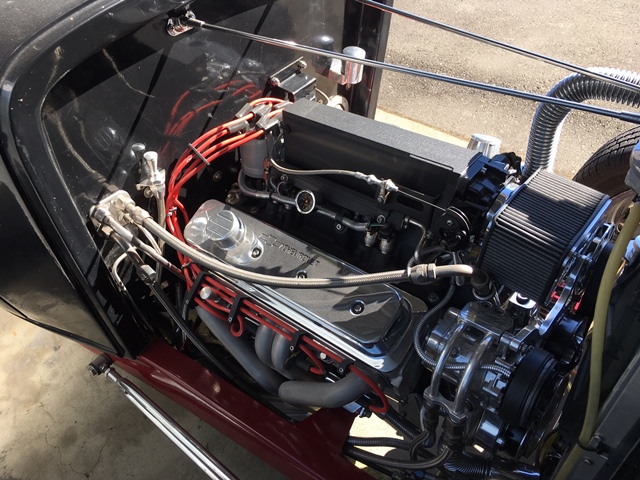
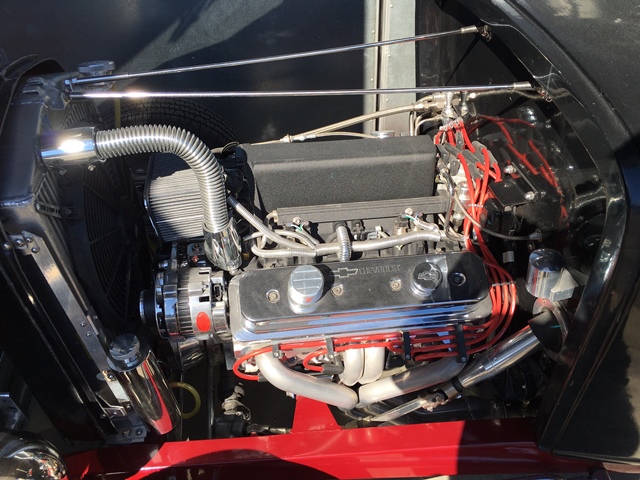
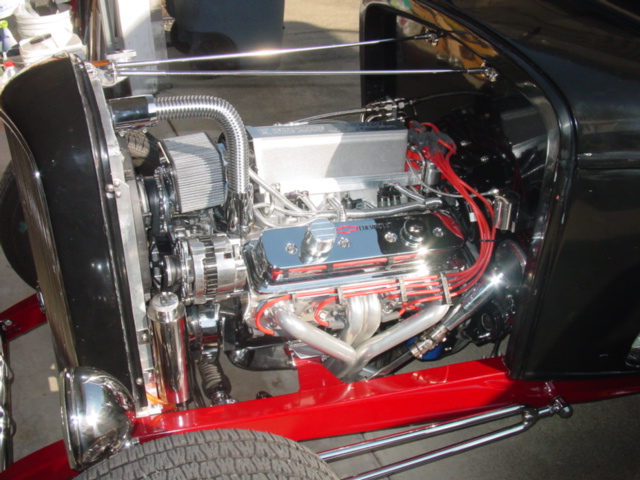
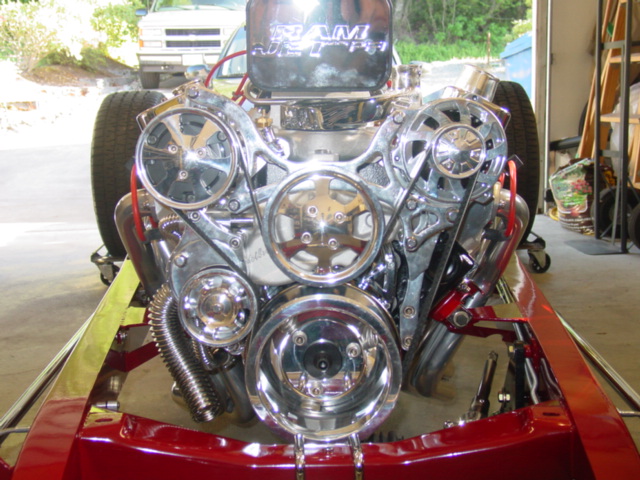
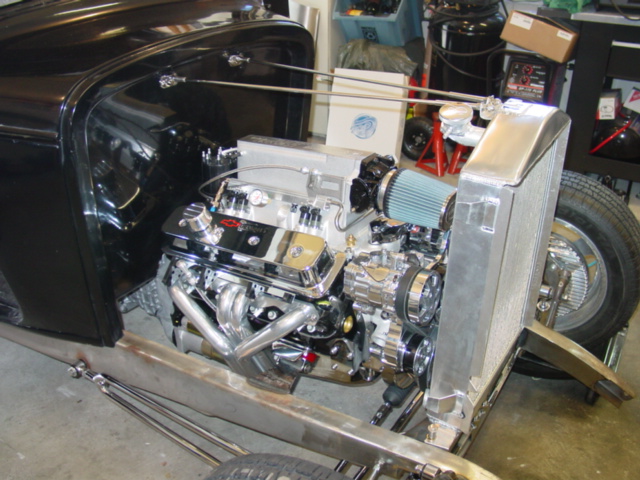
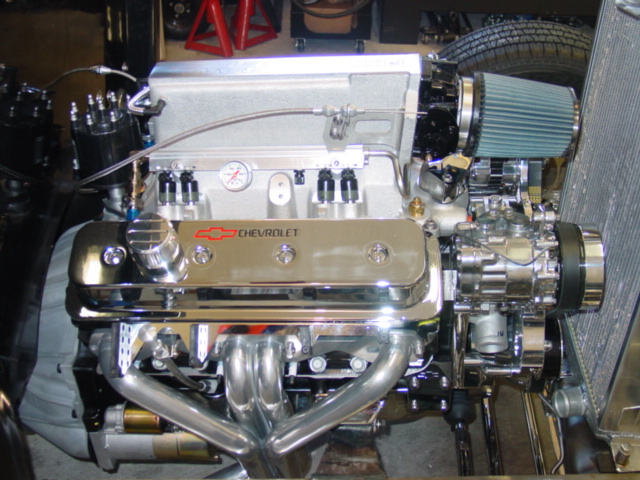
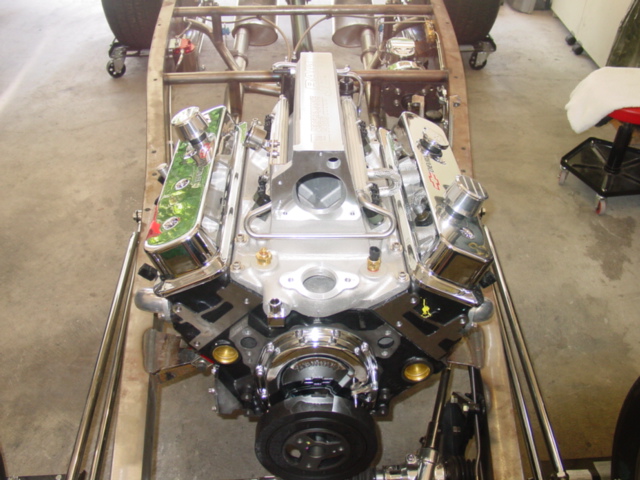
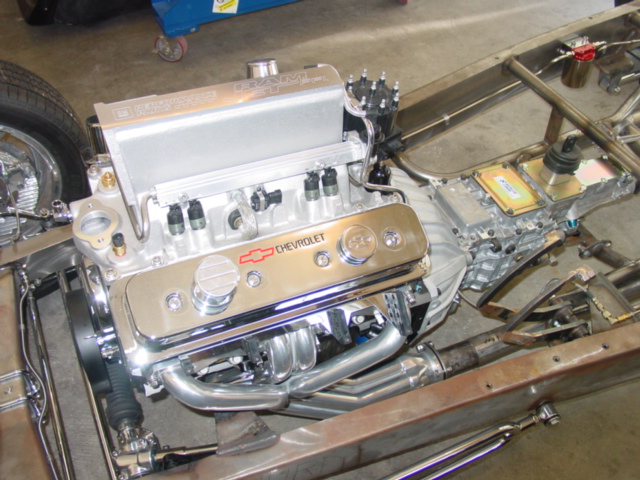
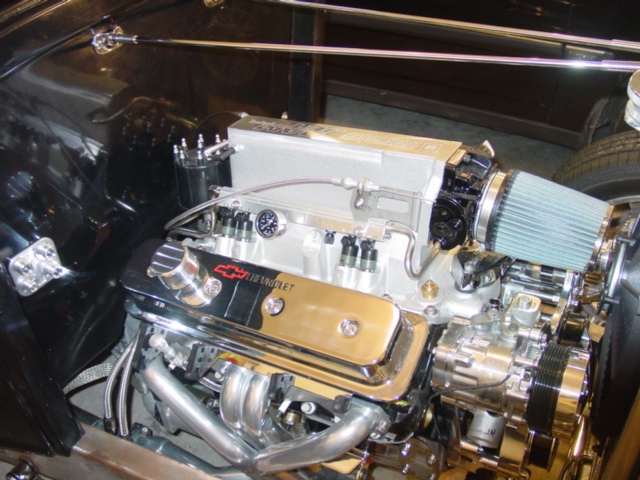
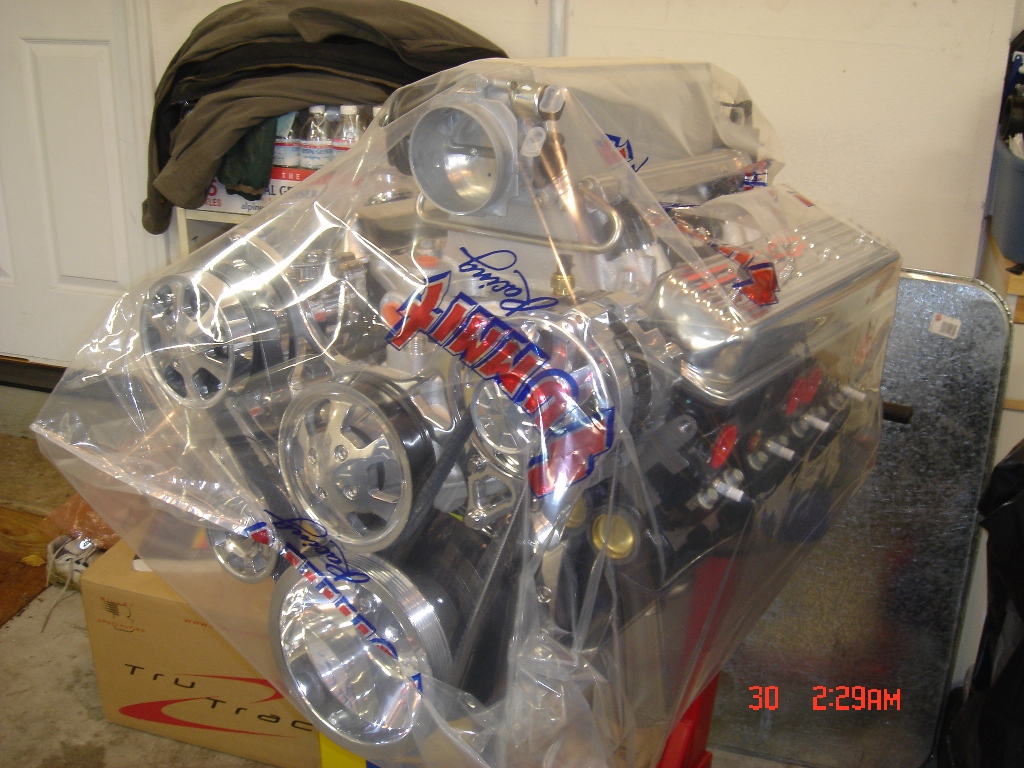
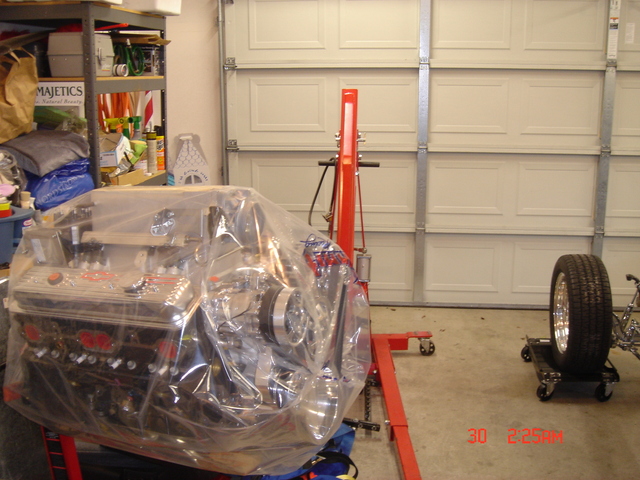
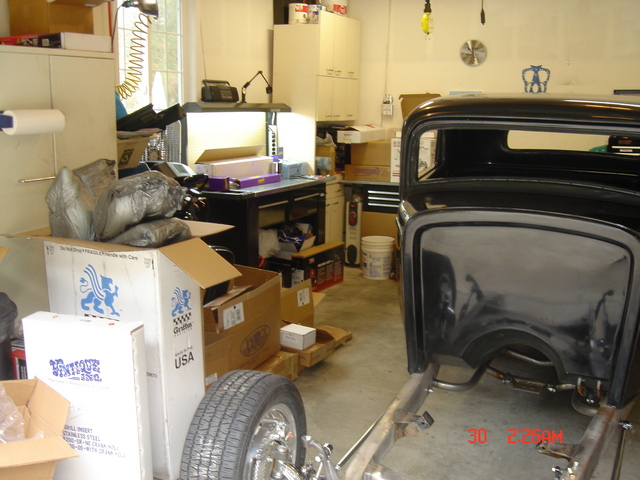
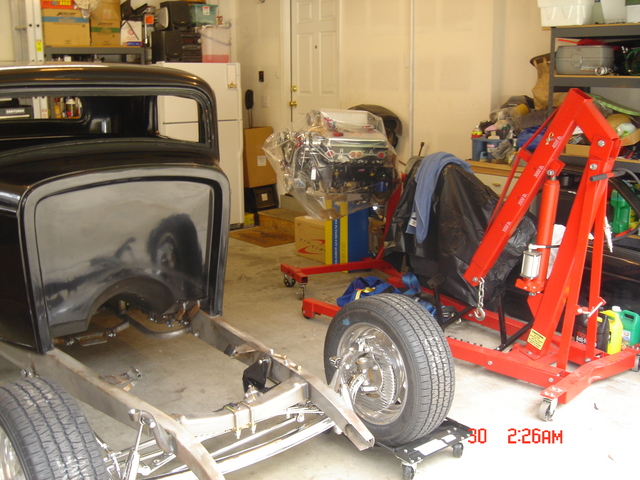
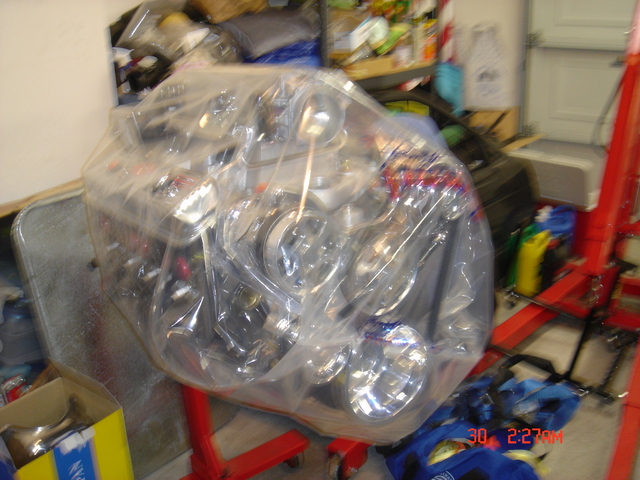
   Here's some nice shots of the front of the engine, with all the accessories, and the water pump removed. So we can view the shinny new polished cast aluminum timing chain cover. The reason for the change is not just that it looks better, and well, it is pretty slick. But, the new cover also is a bit deeper in the cam gear area. So it allows for better clearance for the double row timing chain, & the cam gear bolts. 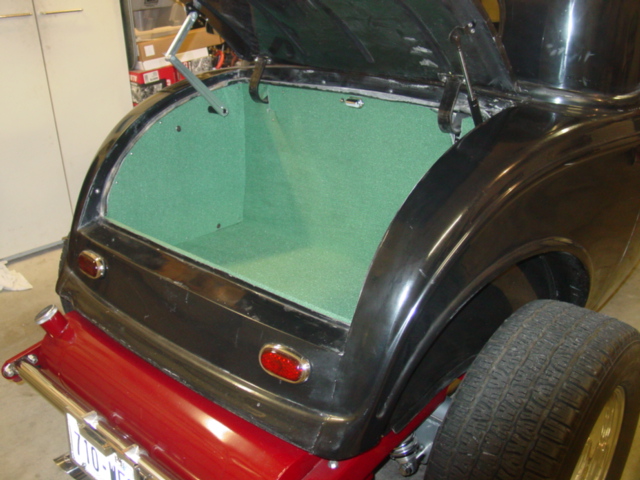 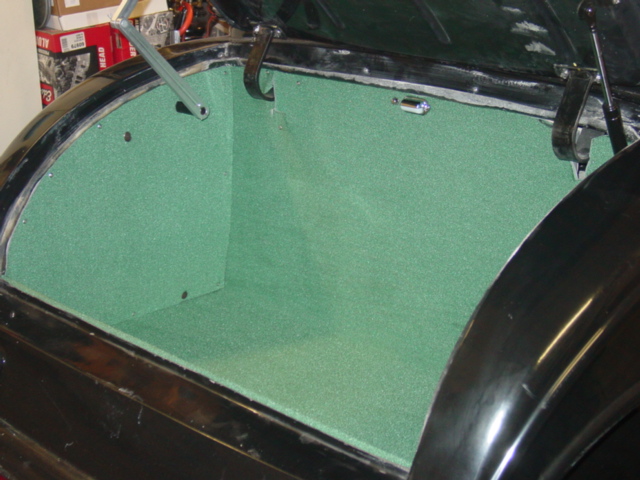 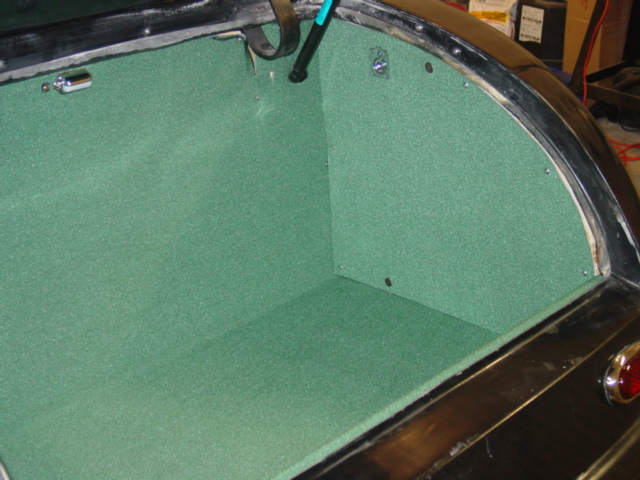 Well... I installed the carpet in the trunk! Hmmm.............. But I have to say the color which when I viewed the samples a more blue green, kind of teal color. This is just not going to work! Too much like Christmas, or putt putt golf anyone? o I had to go back to the old drawing board. And decided to order both a different color, and also a much more plush type of carpet. The new carpet is a much more subdued dark grey or charcoal color. This should go much better with the dark red. **********************************************************************************************************
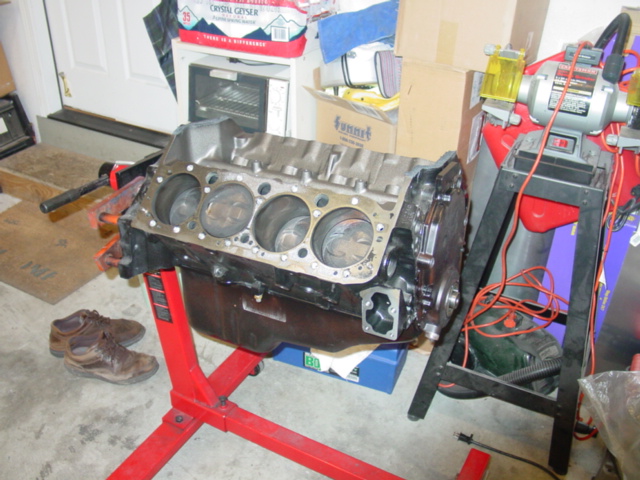
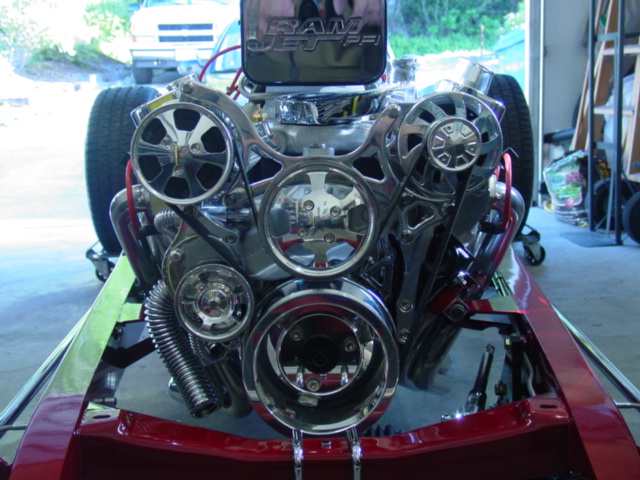
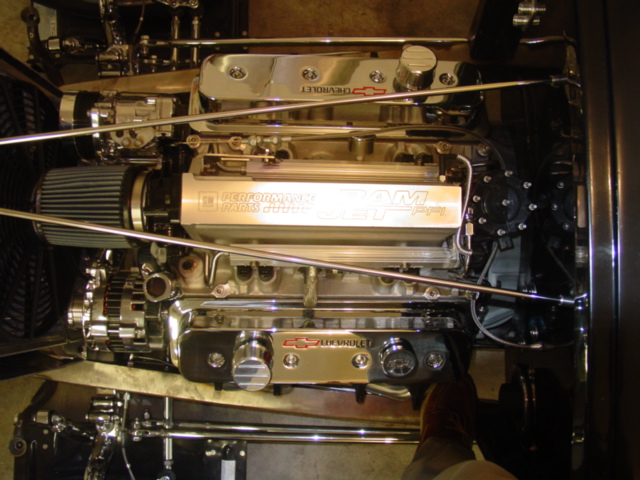
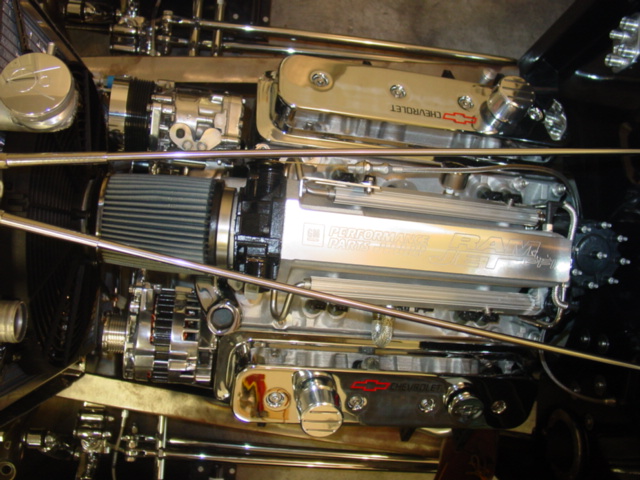
The old Ram Jet 350 is now a Ram
Jet 383.... And WOW it's a real power house!!
The 383 Stroker Engine has
arrived & Installed! |
||||||||||||||||
 |
 |
 |
||||||||||||||
|
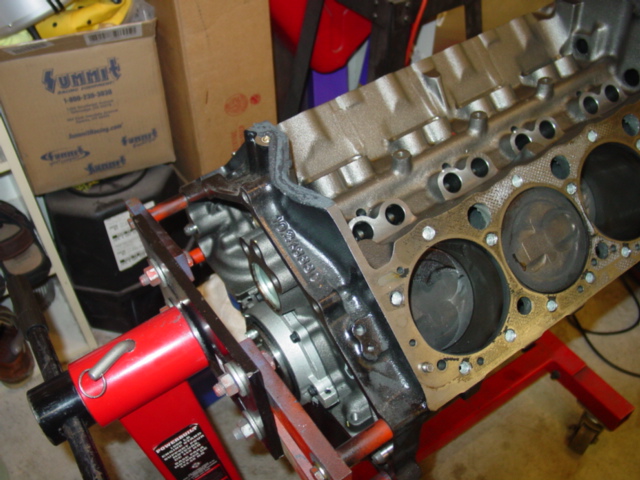
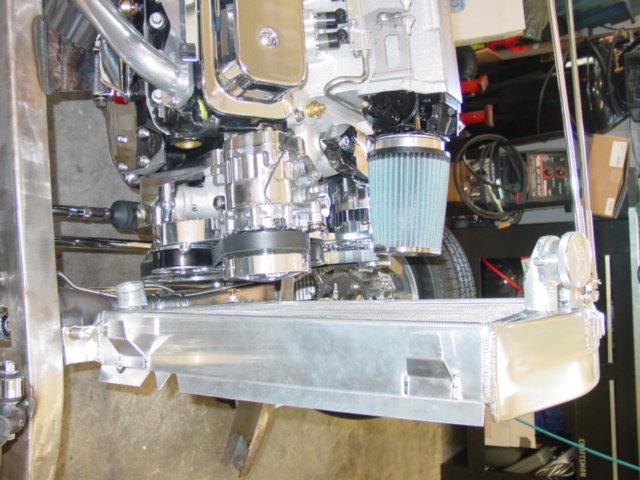
Here is a shot of the lower side with Windage tray from the rear of the engine, and another
view from the front & the side as well. The Windage tray had to be specially cut and formed to allow for clearance with the longer stroke of the 400 crank. |
||||||||||||||||
 |
 |
 |
||||||||||||||
|
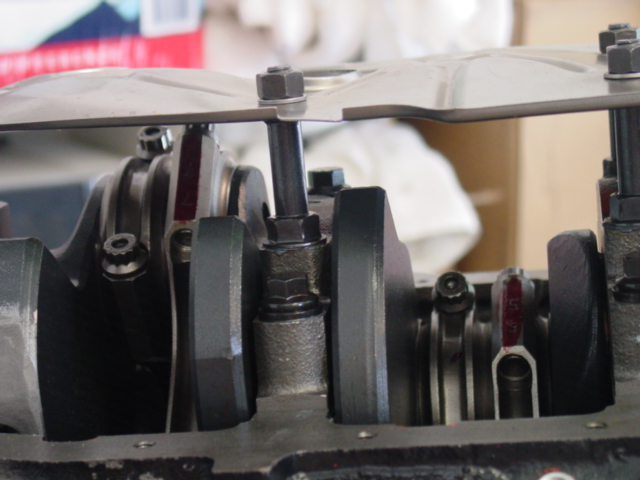
The left hand
picture shows the under side of the #4 piston and rod. The middle and right hand pictures, are of the original 350 Ram Jet block now out of the car and on the engine stand. Note: It the Ram Jet had approx a 9.6 compression, with this block and pistons and the Edlebrock 64 CC Aluminum Heads. With the 383 we now are at 10.75 with the same 64 CC heads. |
||||||||||||||||
 |
 |
 |
||||||||||||||
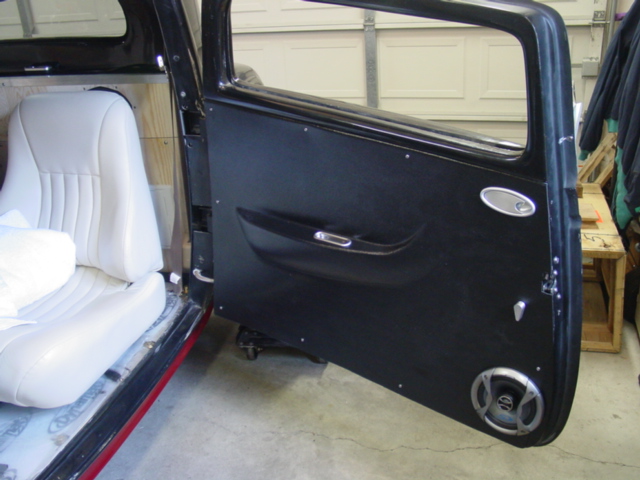
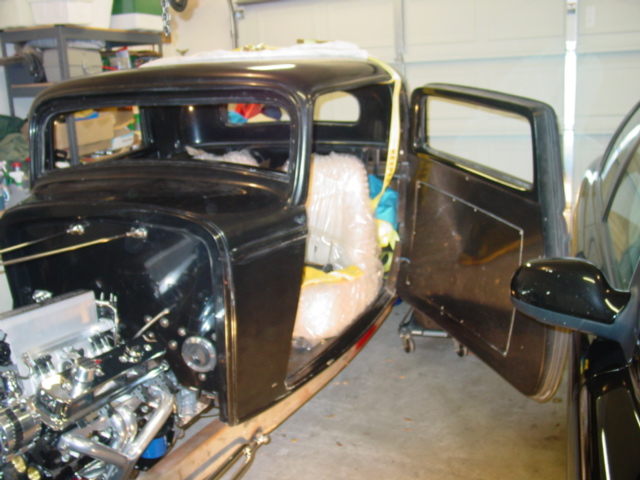
| I finally had time to cut & install the Rod Doors, on the inside of both suicide doors. There now an arm rest, and also has a door pull, that I've added into the centre of each arm rest. I just found these beauties from the AutoLoc company. As they just came out with these a couple of months ago. I still need to add inside brackets to each pull to add strength in this area. Later... (September 2007) | ||||||||||||||||
 |
 |
 |
||||||||||||||
|
I now have Tunes for the road! >
Not that you can hear the music while driving! Except well maybe at the
traffic lights? Oops ;) On with the progress, during late July and early August, I was able to install a first class audio system in the old Hot Rod! The system is all Alpine except for the Kenwood Subwoofer (it was smaller than the Alpine unit), it's 4+1 system, with an add on adapter unit (not shown) that accepts a removable USB memory device, which is able to store more than 2500 music files. We like it.... Very high tech coolness! (BTW that's about 300 CD's worth of tunes, all on tap!) And on keeping me cool front. The A/C's high pressure line from the compressor to the evaporator (Pic one), was a little too short to allow for the engine's torque movement. (even with the solid motor mounts, oh yah dude you got it... lots of HP!) I had made the original line at the minimum allowed radius for this size of hose & fittings. But this didn't allow quite enough slack. So, I build up a new line which is a bit longer, and has a larger radius in the lower loop. (August 2007) |
||||||||||||||||
 |
 |
 |
||||||||||||||
|
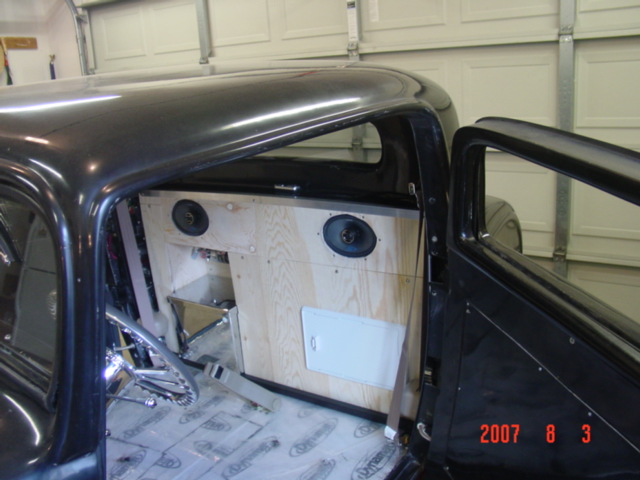
Shots of the Alpine head
unit, mounted in it's newly hand built roof mounting box. Also we can see the subwoofer, & Amp mounted in area behind the seats, shown here with the access panels removed. Note: The center picture was shot in a portrait view, and is on shown on it's side here to preserve the web page's format. Just click on the image to see it in the proper orientation. |
||||||||||||||||
 |
 |
 |
||||||||||||||
|
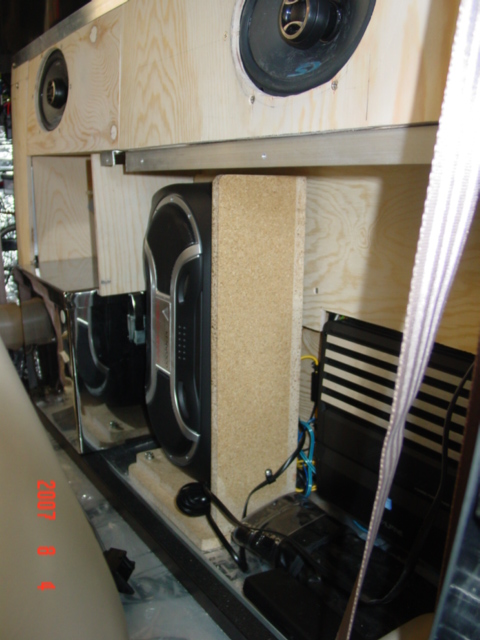
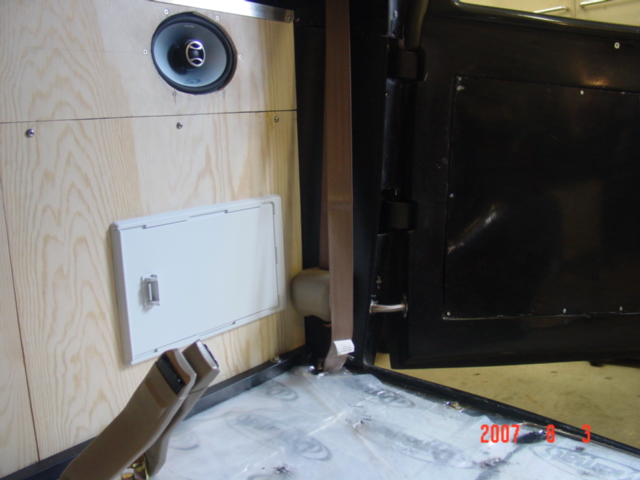
A side view of the overhead mount
for the Alpine head unit. Here is a view of the rear two speakers & mounts,
and the enclosure covers located behind the seats. Seats are still removed
at this point. Note: The Halon Extinguisher mounted above the battery box. Also note the new three point seat belt installed there on the Driver's side B pillar. The lap belts had to go. A classic, true, but the "One Handed Buckle Up" allowed with the updated (standard) three point type belts, are so much nicer to deal with. |
||||||||||||||||
 |
 |
 |
||||||||||||||
|
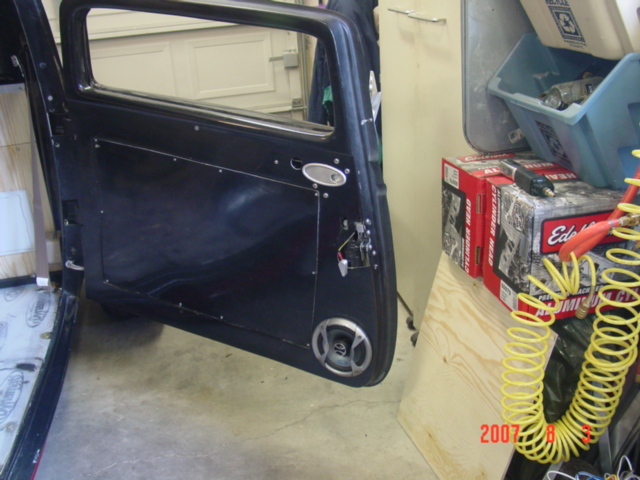
Did I mention a bit more wiring!
(always adding some wiring) This time along with the stereo systems power,
and speaker runs, the Volt gauge power was moved from the rest of the gauges power to it's own source. So is now operational with the key in the ACC, or Ignition positions. (Let the Music Play Man!) Cause with the big Amp driving this sound system, it draws more than just a couple amps. The right hand Pic is a shot of the right front speaker mounted in the lower front part of passenger's door. |
||||||||||||||||
 |
 |
 |
||||||||||||||
| A close up of the head unit powered up for a test run. (Far right) Here you can see the sliding access panel I added to be able to quickly get into the new storage area behind the driver seat. There's the amp inside on the back wall, with it's power light on. |
 |
 |
 |
|||||||||||||
|
A shot of the new rear
Deck/ Storage/ Speaker housing finally all buttoned up! Shown from both the left & right sides. (Seats still removed) In the right Pic, this is a shot of the Driver's door mounted speaker. |
|
 |
 |
|||||||||||||
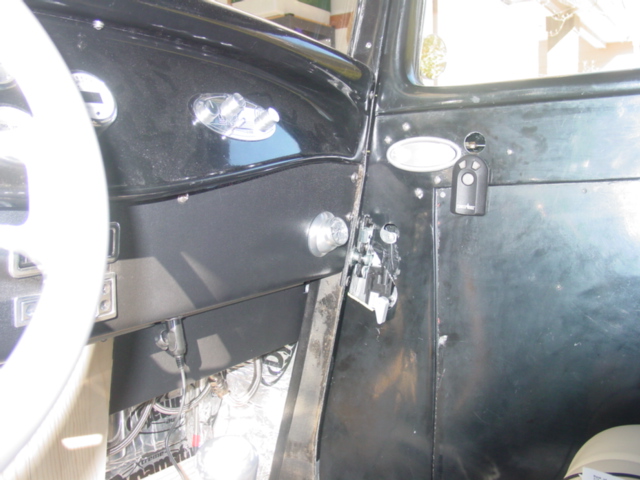
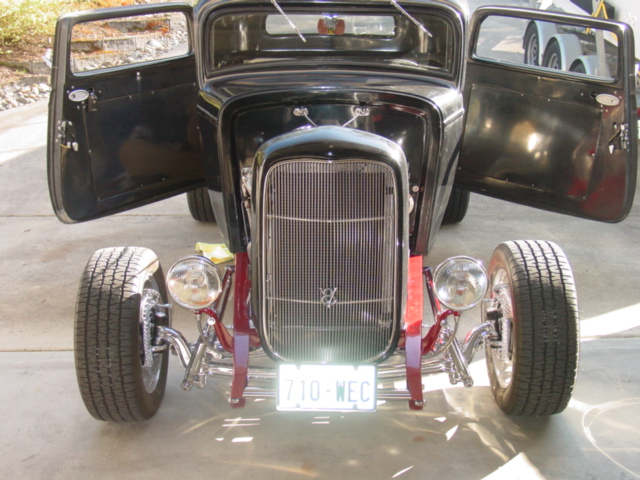
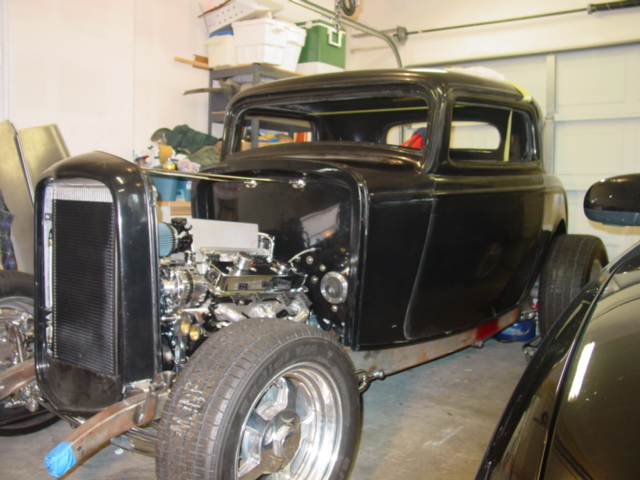
| After a warm day tuning run the motor is looking real fine here in the sunshine. The new safety locks are shown (center) integrated into the bear claw latches. A front view doors closed (right) On the motor front, I'm now running Rhoads (Roddies) variable valve timing hydraulic roller lifters. This improved few issues including the engines warm idle, so that now the computer is better able to cope with a much leaner mixture in the lower RPM ranges. In short very awesome!! (April & May 2007) | ||||||||||||||||
 |
 |
 |
||||||||||||||
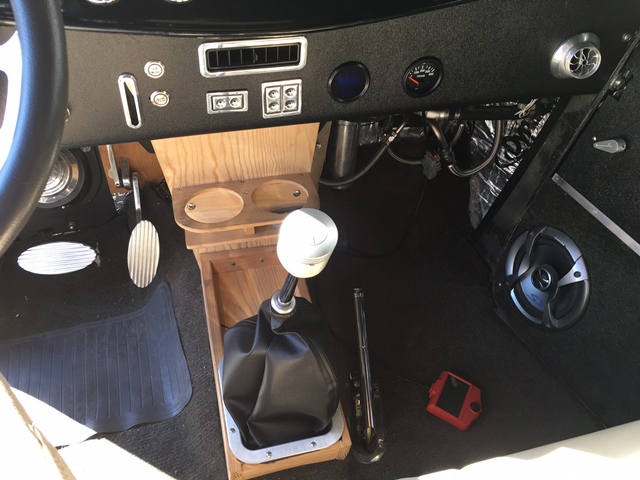
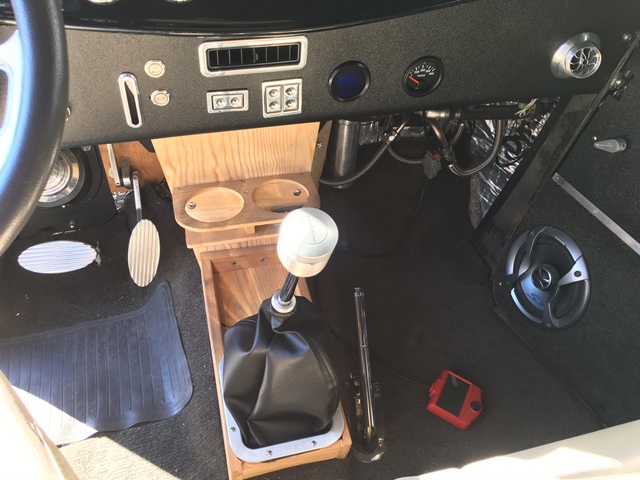
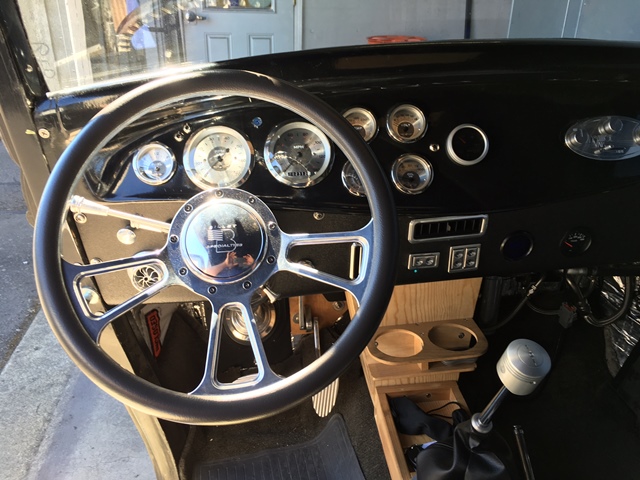
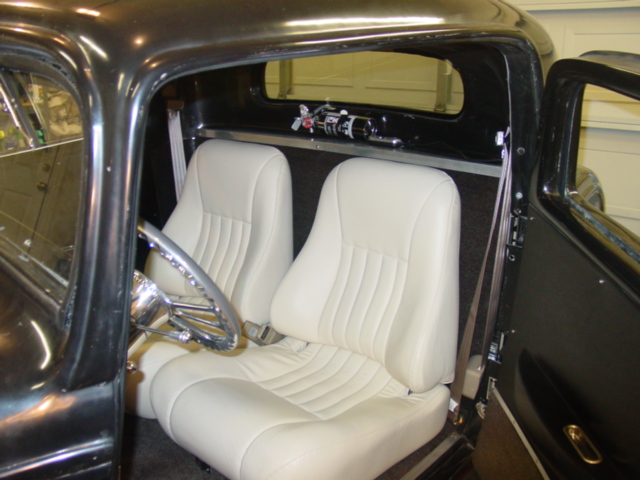
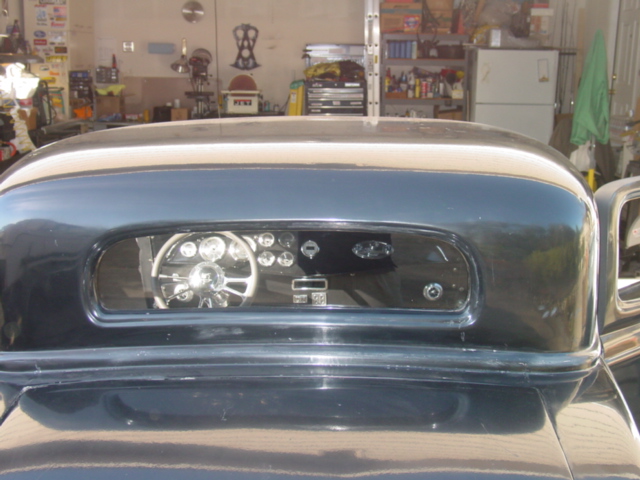
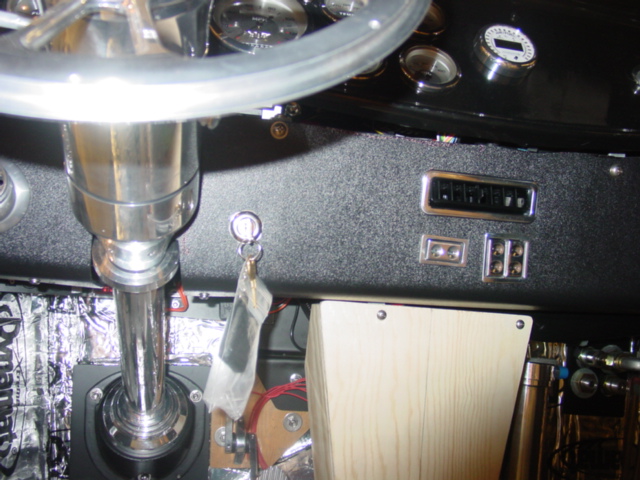
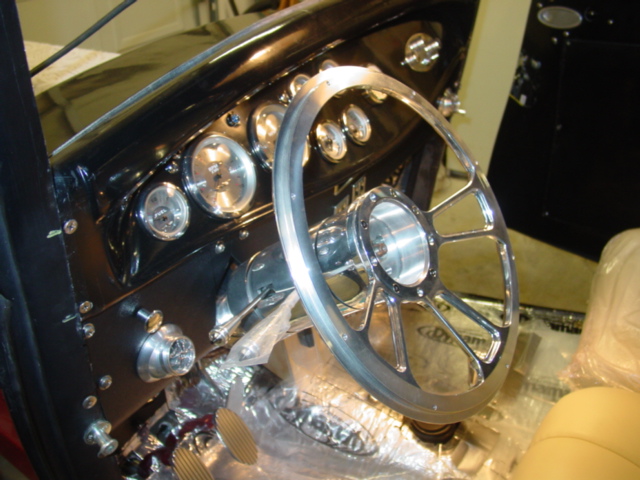
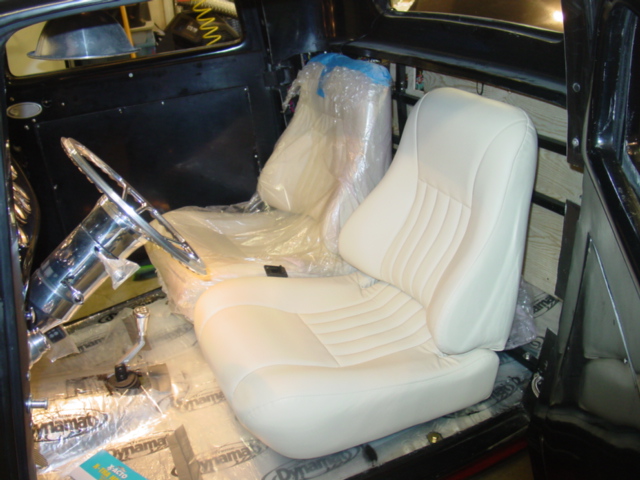
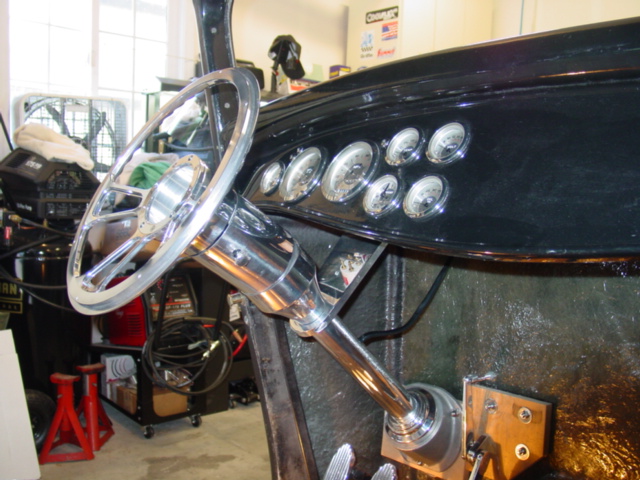
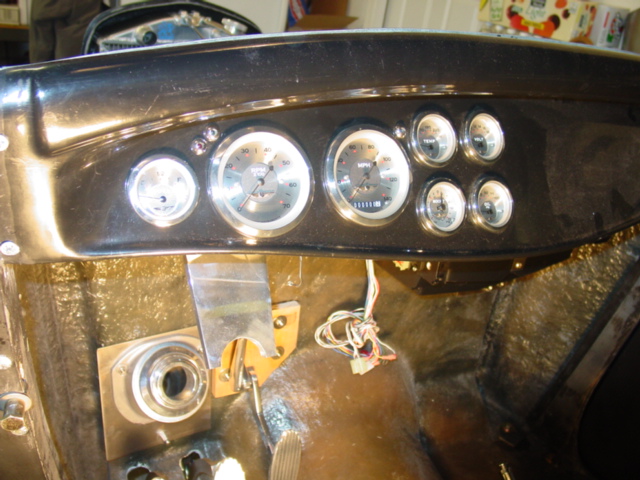
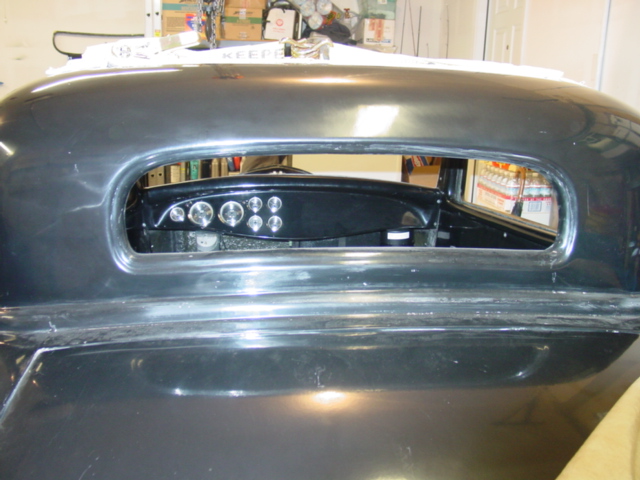
| The lower dash skirts are now installed on both the driver & passenger sides. The steering wheel with the grey leather half wrap is installed for use during test drives. Another half wrap with the same leather as the seats will be installed once the car is completed. The shifter Stick has had an extension added for easier reach. A new cover plate around the Brake and Clutch pedals is now in place. A little hard to make out in these shots. In the right-hand picture we have the Seats looking good, & comfortable too! | ||||||||||||||||
 |
 |
 |
||||||||||||||
|
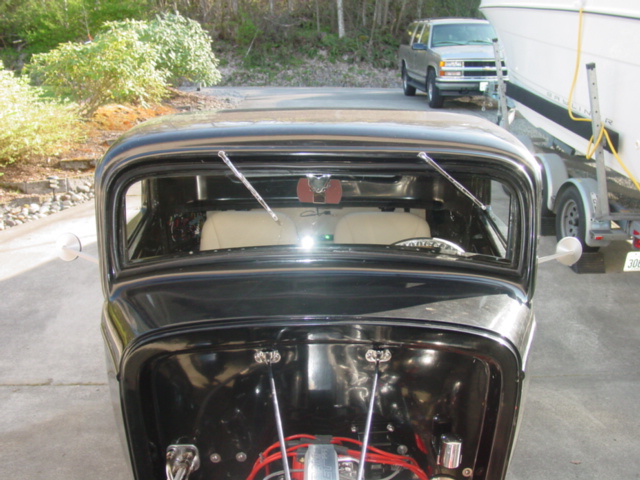
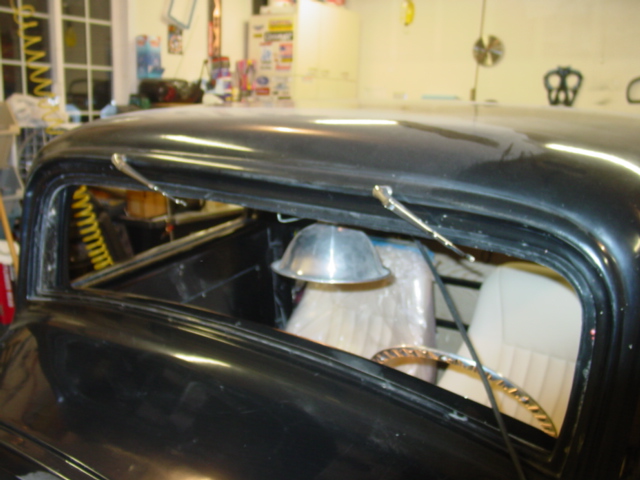
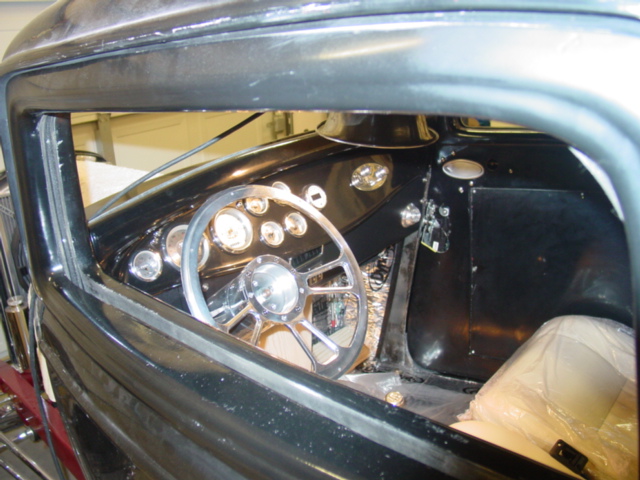
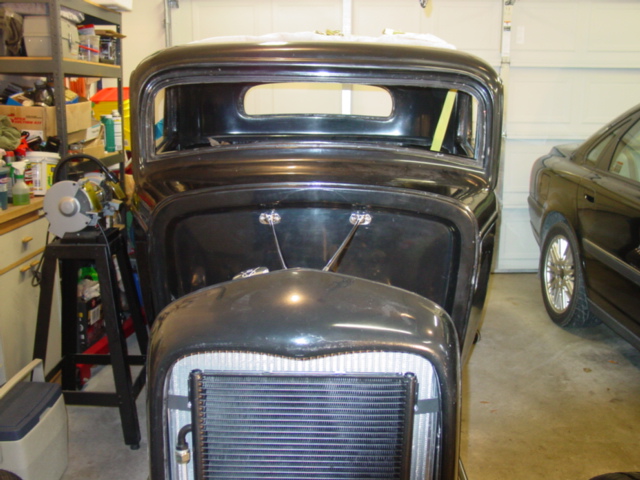
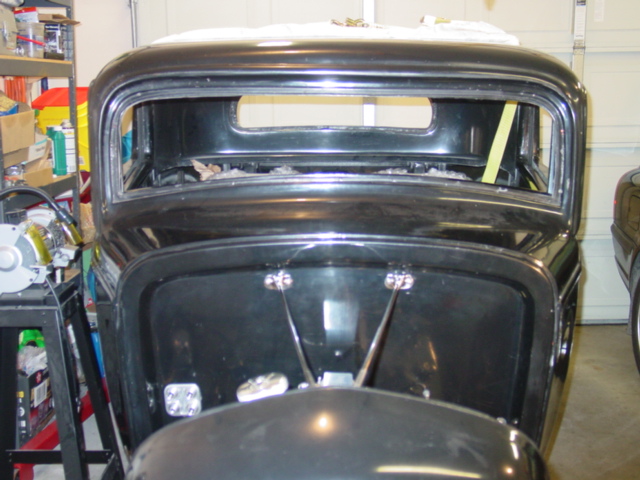
The Both the Front Windshield, and
Rear Glass panes are now in and the wipers are all set to go! Note the front and rear Washington plates are on, finally legal for street operation. (April 2007) | ||||||||||||||||
 |
 |
 |
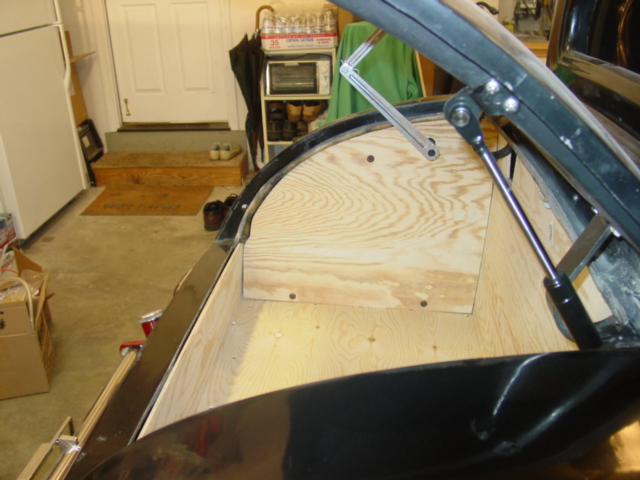
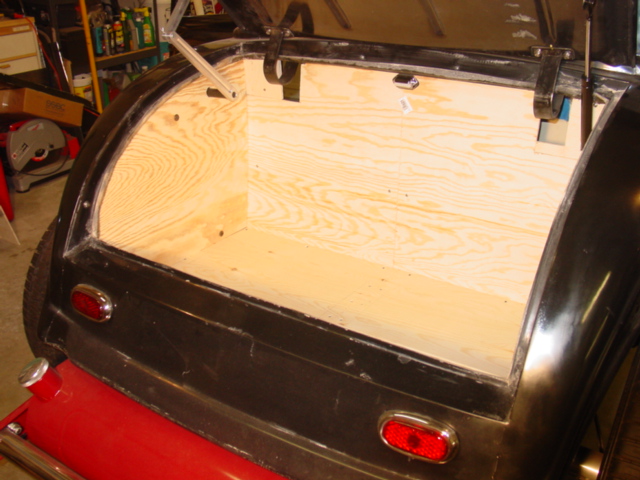
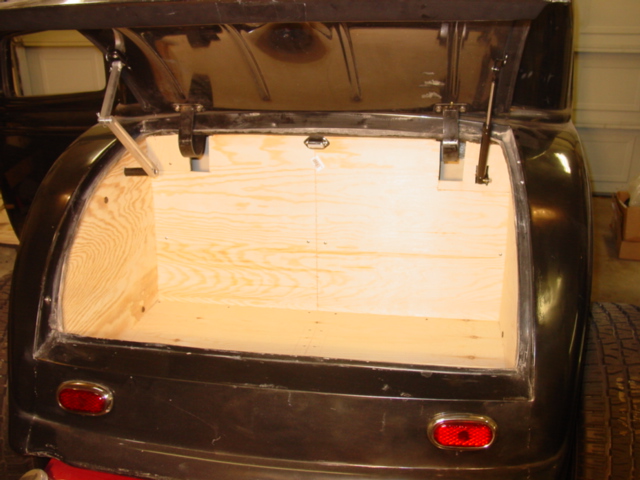
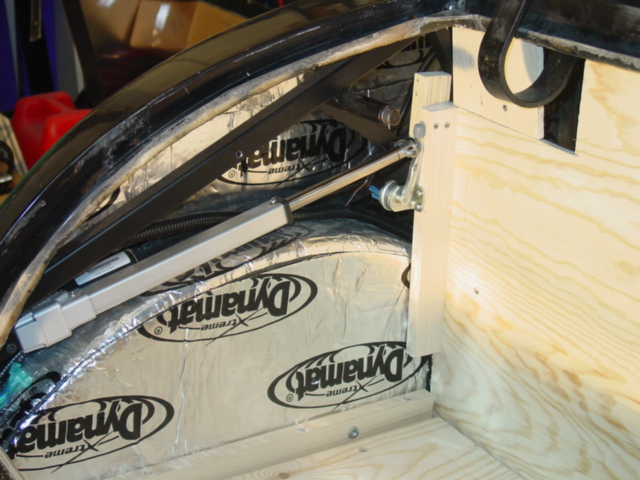
| The trunk area is now fully enclosed, and the remote controlled trunk open/close actuator is operational. And a trunk lid counter balance pneumatic & spring unit has been added. (Nov 2006) | ||
 |
 |
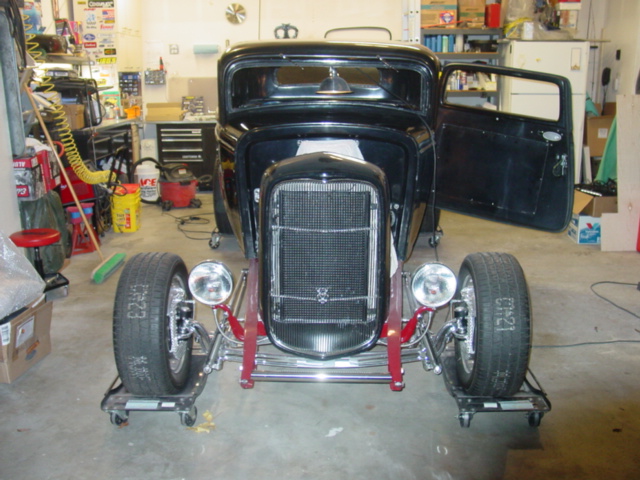 |
| The auto on/off trunk light is now in and working. The front grill is installed, and the V8 medallion is attached to the front grill. | ||
 |
 |
 |
| The dual wipers motors and arms are in, and ready for the windshield. The lower dash is mounted, and the A/C vents Left, Right & Center are in place. The Ignition key/switch has finally found it's home location. The lower center console is in and the passenger side floor plate is mounted. |
 |
 |
 |
 |
 |
 |
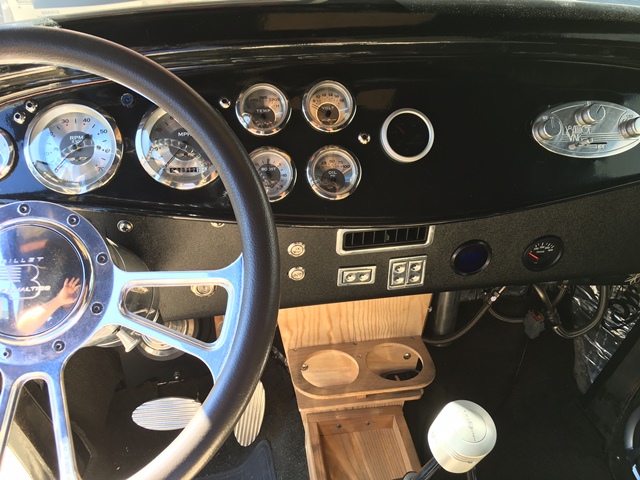
| The Gauges are now all wired up and working, ready for the big day when the Ram Jet is fired up. | ||
 |
 |
 |
|
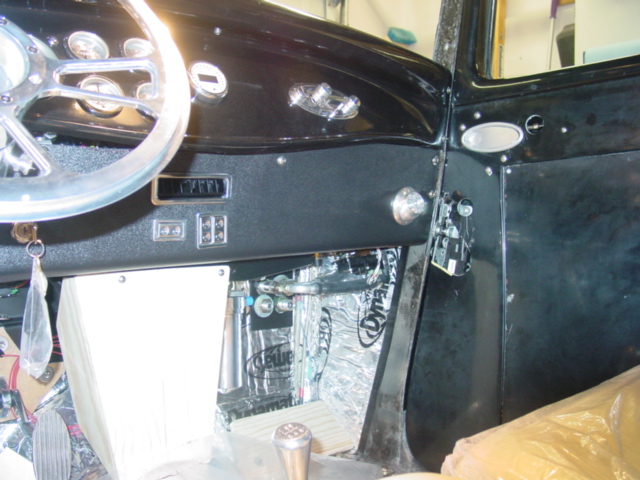
The
seat are now installed, but the seat recline levers still need to be mounted.
The inside door handles are in and fully operational. The remote release
actuators, are also in, and the door can be open via one push of the remote
key fob, any the ignition is not on. The A/C drier & lines can still be seen below the lower dash, but once the lower skirt is added to the passenger side lower dash they will be almost out of sight. |
||
 |
 |
 |
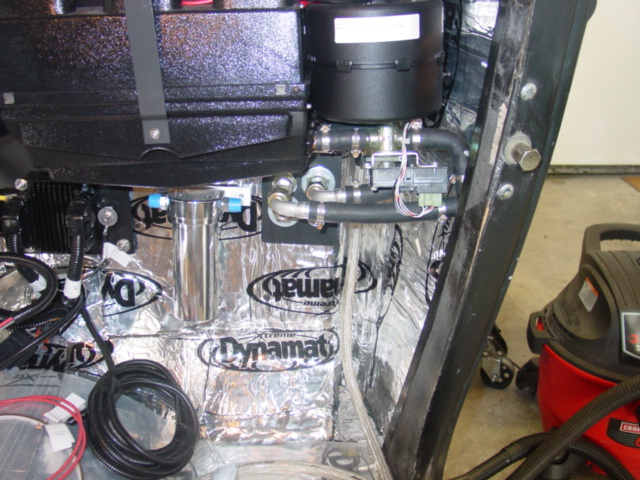
| This is a look at the trunk actuator after installation, and the rear Electric fuse/remote control panels. Both with the access/trim panels removed. The black box in the foreground is the trunk actuator controller. (Oct/Nov 2006) |
 |
 |
 |
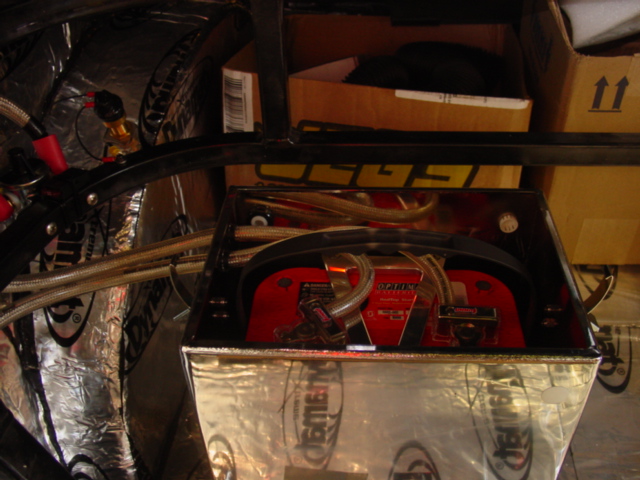
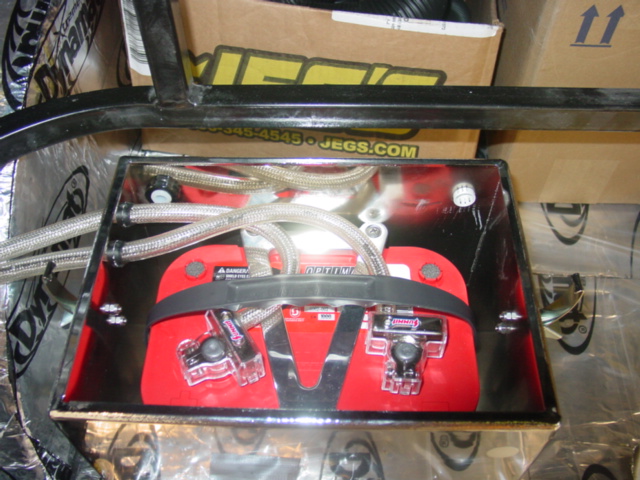
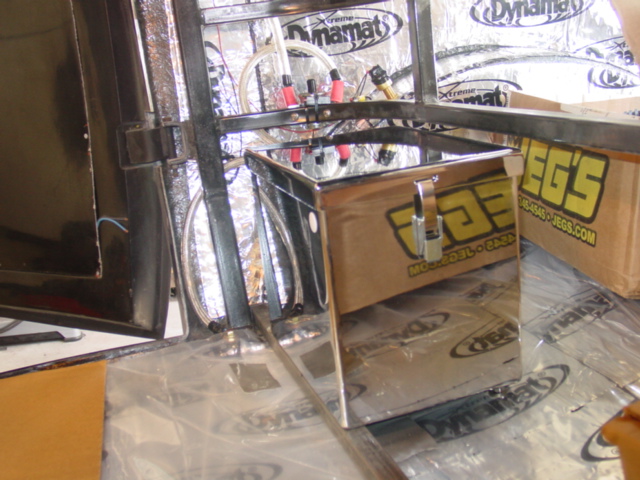
| The Battery Main power Cable is now run all the way down to the Starter. Another shot of the battery box installed, it's behind the passenger seat (but the seat is removed in this shot) The battery main cables & the Battery remote master switch (June 2006) | ||
 |
 |
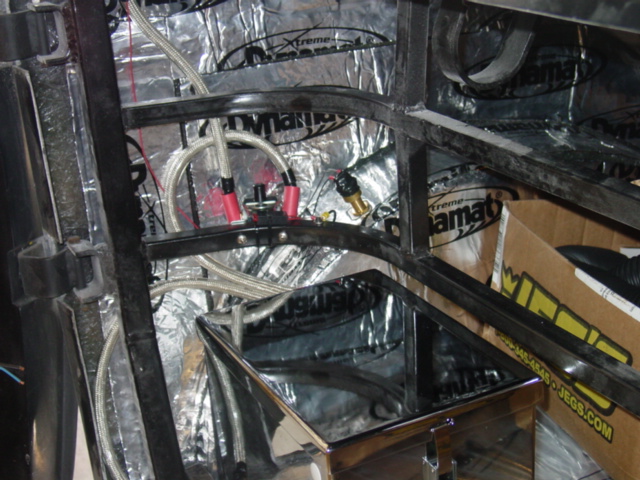 |
| The battery box with the Optima Gel Cell, and all the main cables are all ready to go! | ||
 |
 |
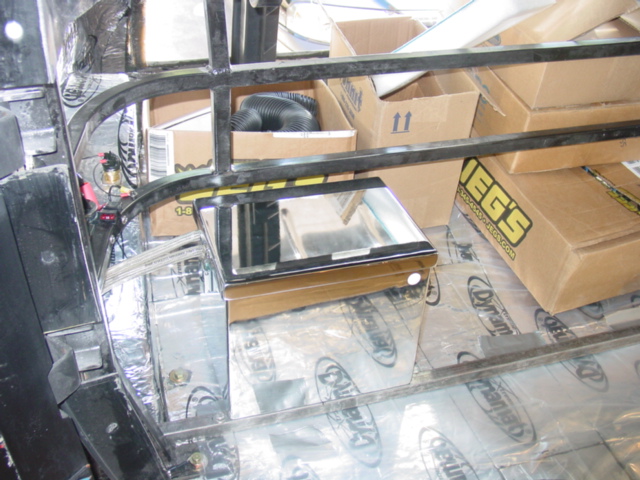 |
| The Remote Battery master switch, & the battery box shown with the cover in place. | ||
 |
 |
 |
|
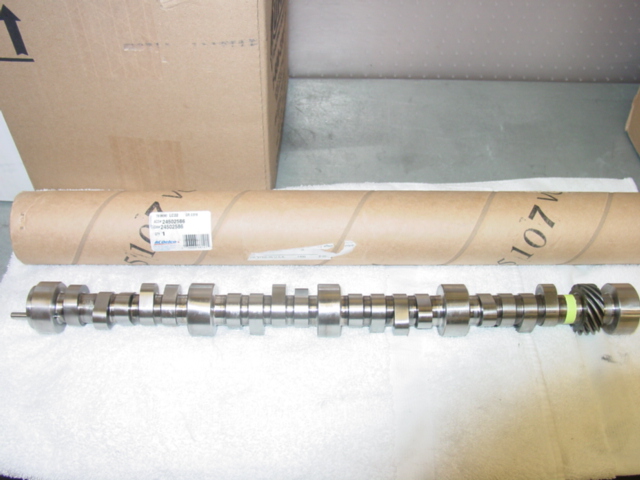
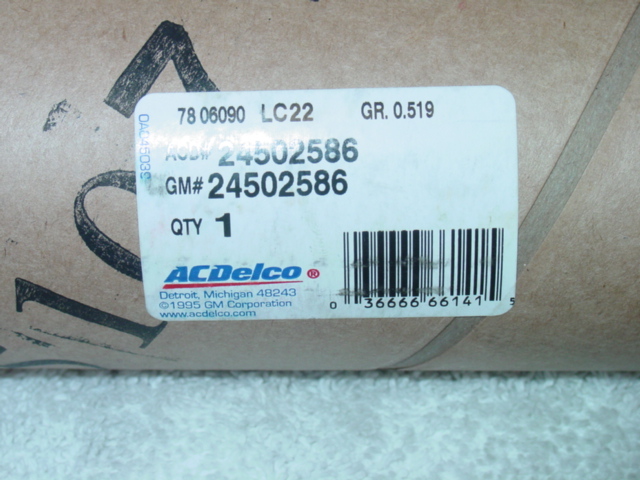
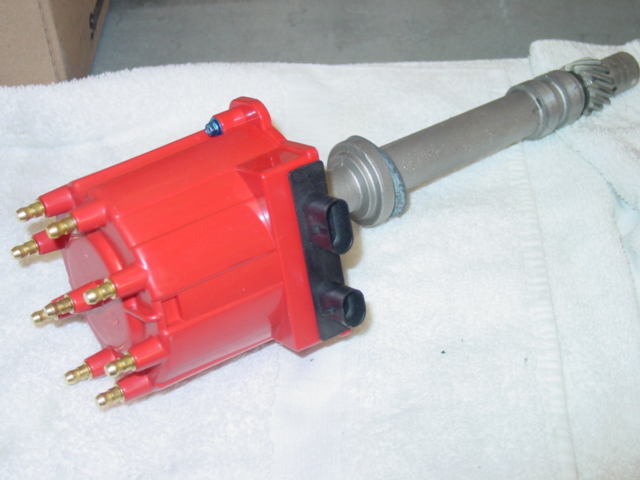
Cam in the House!
The LT4 Hot Roller Stick has
arrived! (See below for more cam swap details) Ok.... so the HEI (small cap) distributor cap now comes is Red. So we just had to have one of them! (May 2006) |
||
 |
 |
 |
|
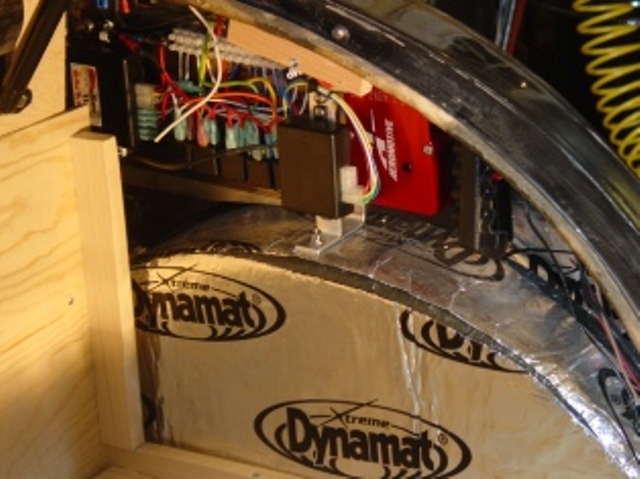
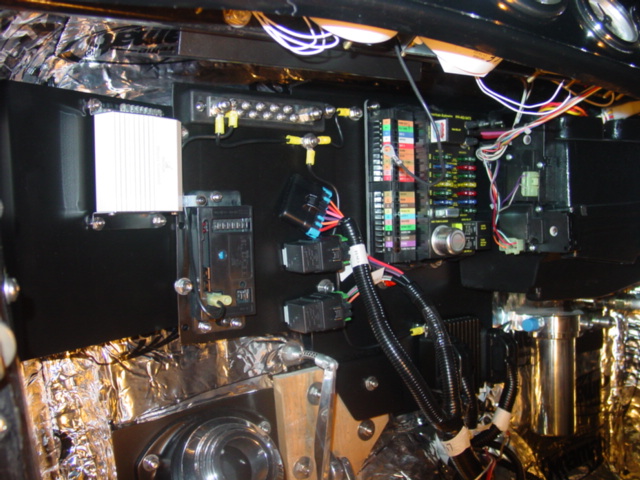
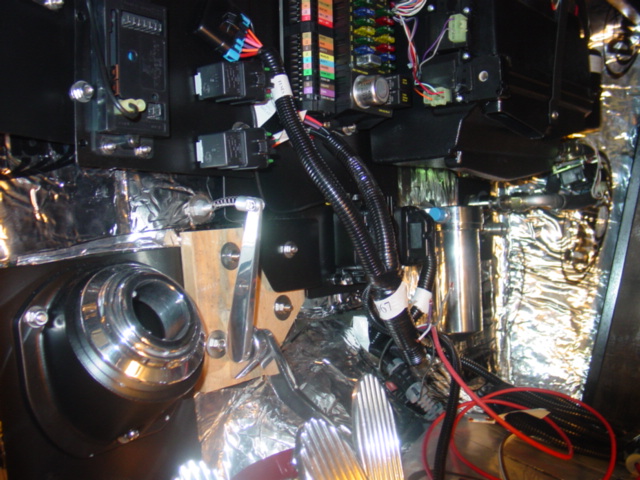
The
Firewall (inside) Electrical panels are all now back in place. ** Next I'm
on the rest of the Electrical Wiring. Also in the middle is the Ram Jet's ECU, a MEFI-4a. Which since this picture was taken, has been swapped out for a programmable MEFI-4b. (Which appears the same outside. But has much more potential HP wise, with it's added software tuning capabilities!) |
||
 |
 |
 |
|
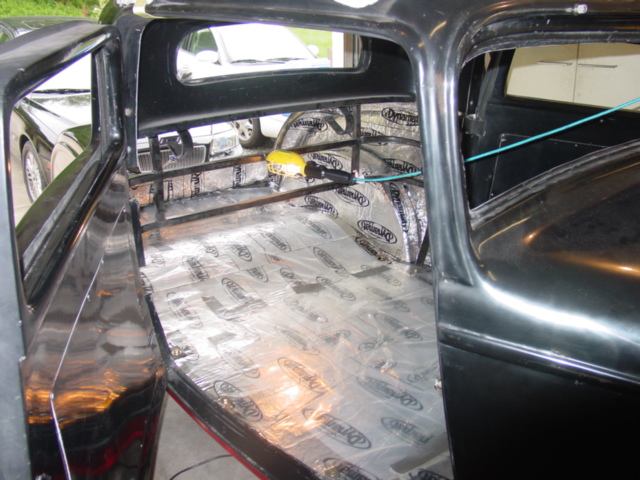
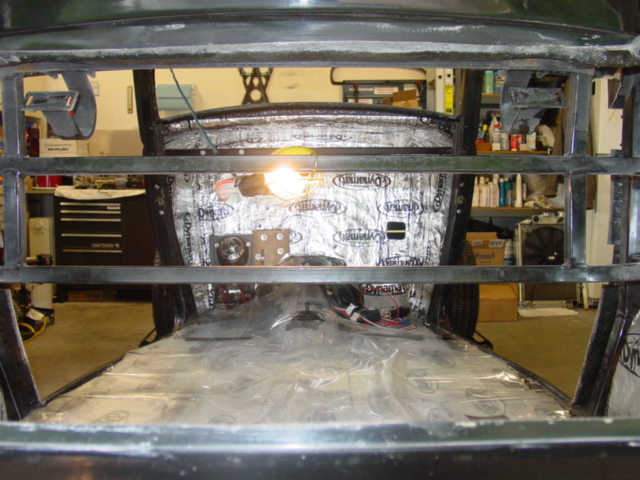
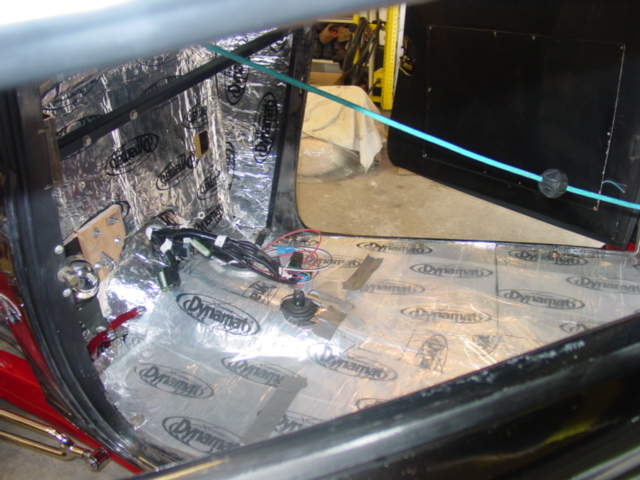
The Dynamat insulation is now
installed throughout the main interior. Also still have to work in the
schedule for the body paint soon! The Battery box is already in place but not shown yet. |
||
 |
 |
 |
|
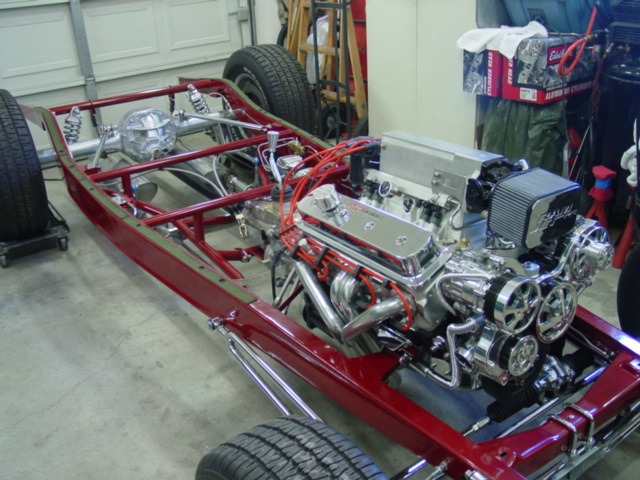
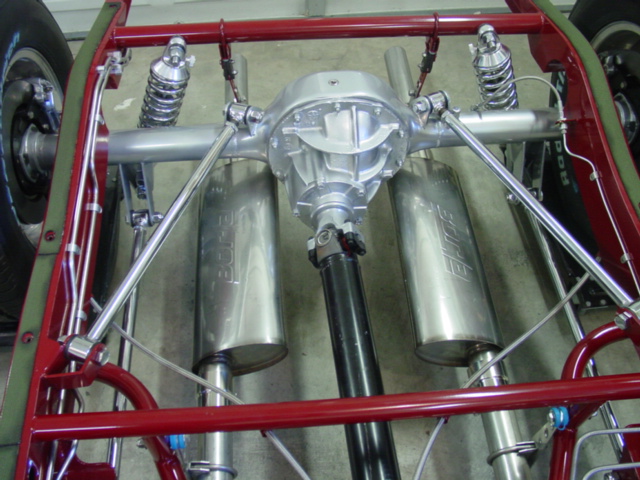
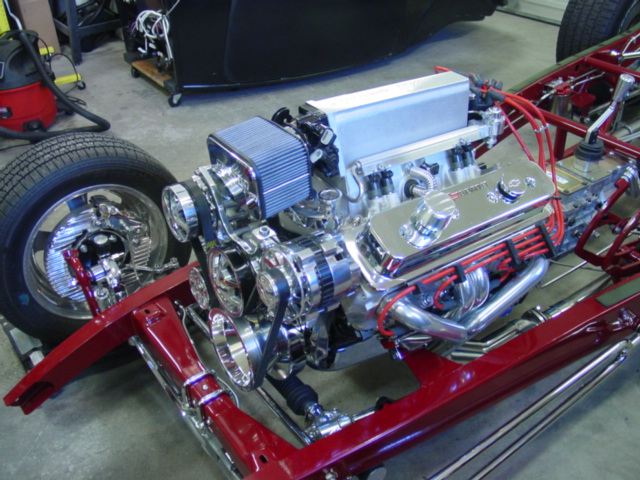
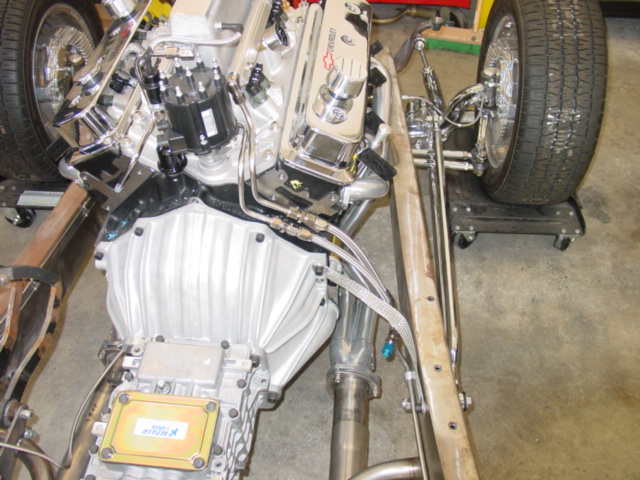
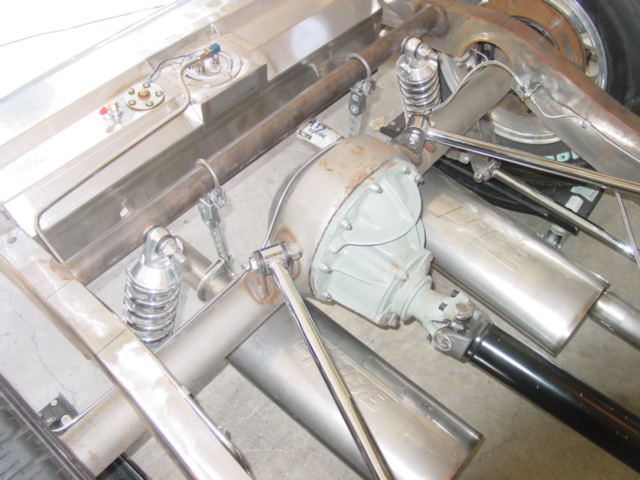
The full Drive Train & Exhaust
system all in, and the ignition wires are test routed. Also the here is
the 9" Ford Rear
now fully complete and serviced. Hidden inside the third member is a 3.5:1 Ratio,
with PowerTrax possi ready to run! The power plant is almost completed, except.... > |
||
 |
 |
 |
|
>the motor still needs to have the
valve pushrods installed & adjusted, and then the intake manifold and bolted down. But for now with all the pushrods out all the valves are kept closed. Also shown is the Fuel pressure gage, now with a black face. Also a new MEFI 4b ECU, with InGenius software is on the way from UMI Racing in Arizona. (Now from MSD. as of: Aug 07) This ECU upgrade will allow me to fine tune the motor.... to get that optimum performance that you just got to have! |
||
 |
 |
 |
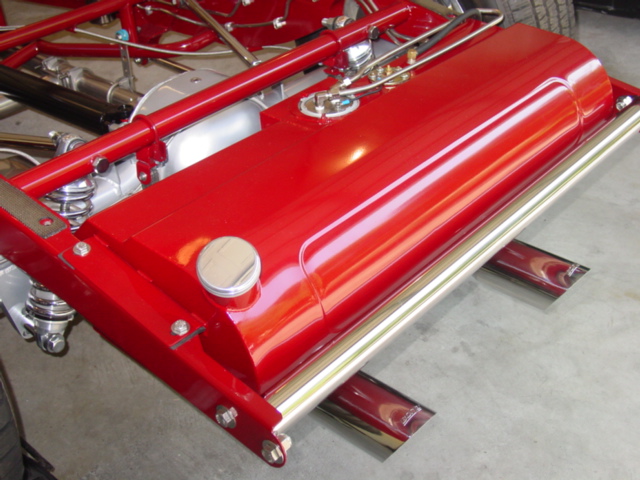
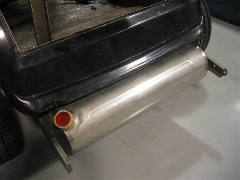
| Yeah the fuel tank is back form the powder shop. Now fully installed & the Fuel system is all completed including the final pressure testing to 85 psi, with no leaks on the first try! Amazing!! (BTW: The Fuel tank is the same color as the frame, it's just the sun's reflection in this picture, just makes it look like it's painted in a different shade of red) | ||
 |
 |
 |
|
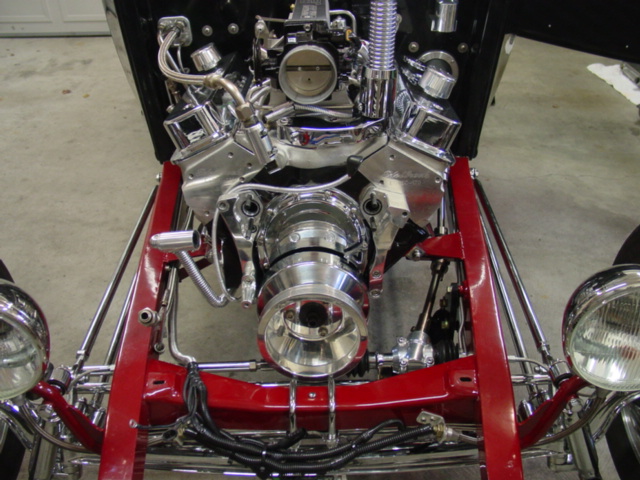
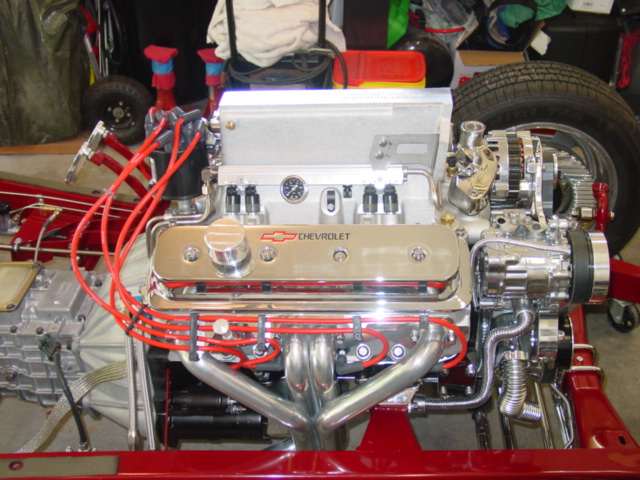
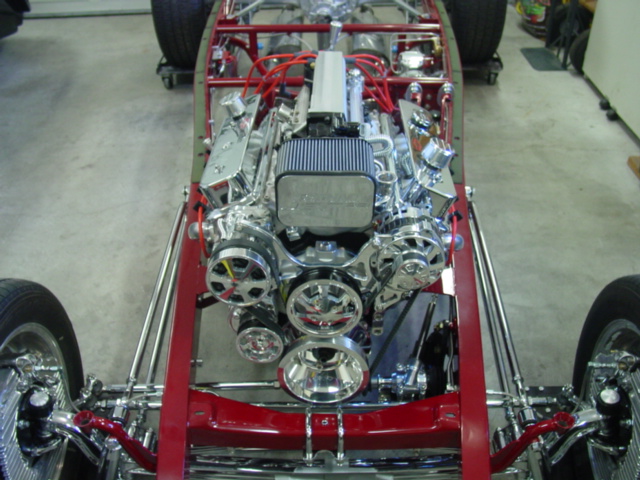
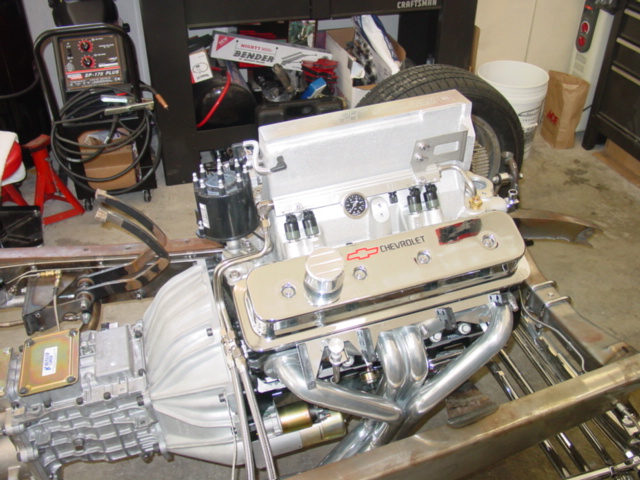
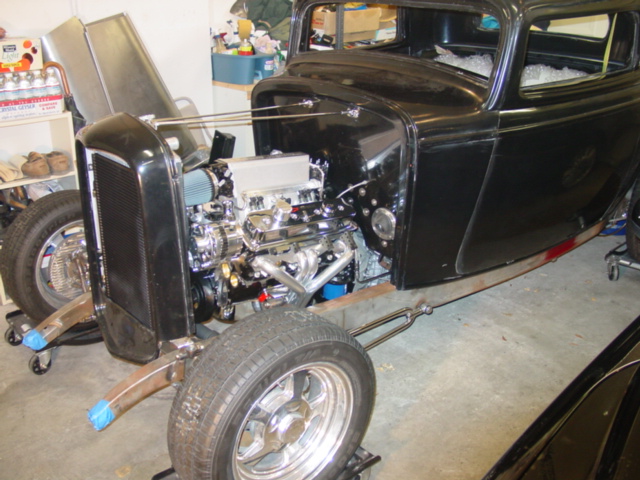
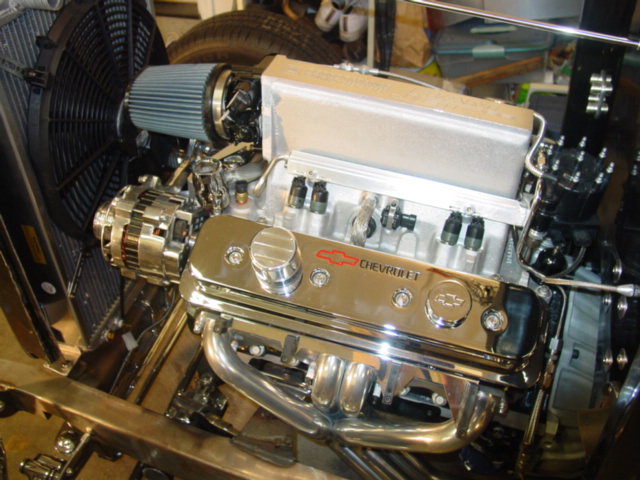
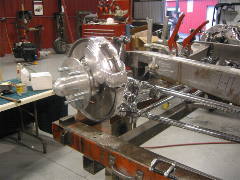
The Motor is now back in place!
Shown with the Tru Trac Serpentine drive system back on. The Ram Jet 350 is
no longer stock! The cast Vortec Heads were replaced by Edlebrock E-Tec 170 Aluminum Fast Burn heads. (April 06) > Cam in the House! (See above) The Cam was swapped out from a rather mild Roller cam: 196/206 @ 0.050" tappet lift. To a "LT4 Hot Cam" Roller with: 218/228 @ 0.050" tappet lift. The lobe centerline is 112� vs. the 109� for the first cam, so the engine's idle vacuum will still be very good. (May 06) |
||
 |
 |
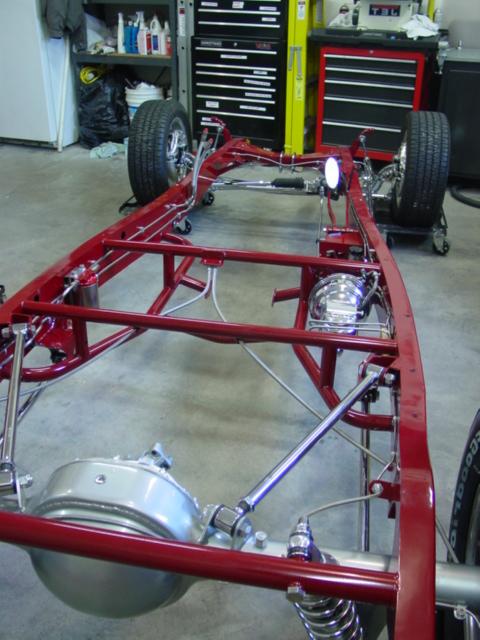 |
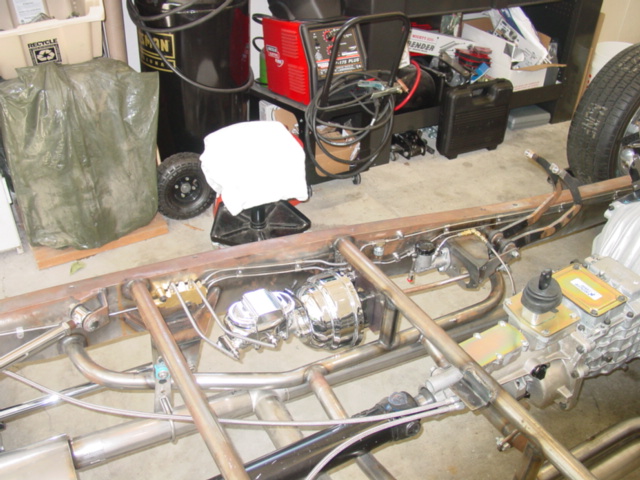
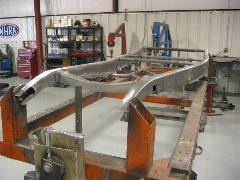
| All items on the frame are put back one at a time. | ||
 |
 |
 |
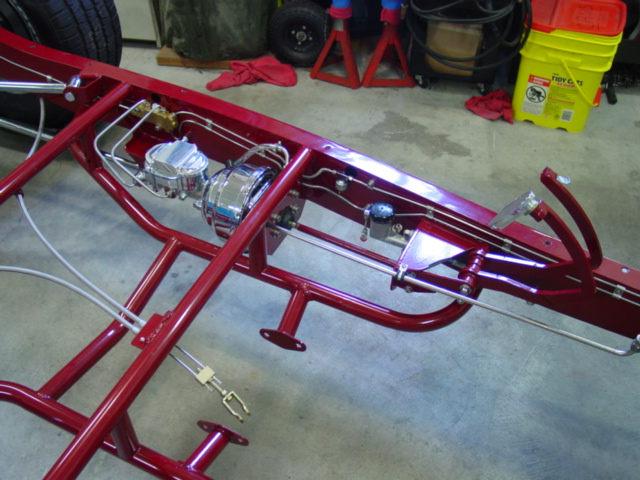
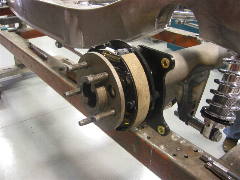
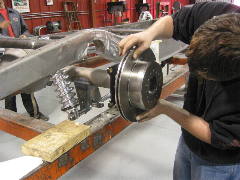
| Still installing the this and that! But the Brakes are now fully completed, including the pressure test! | ||
 |
 |
 |
|
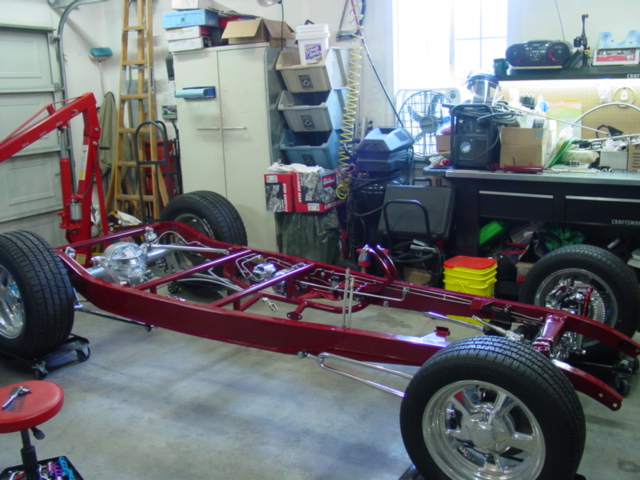
The Frame has returned from the
powder coater's! And I have re-installed the stuff: Front & Rear Ends, Brakes, fuel system etc. |
||
 |
 |
 |
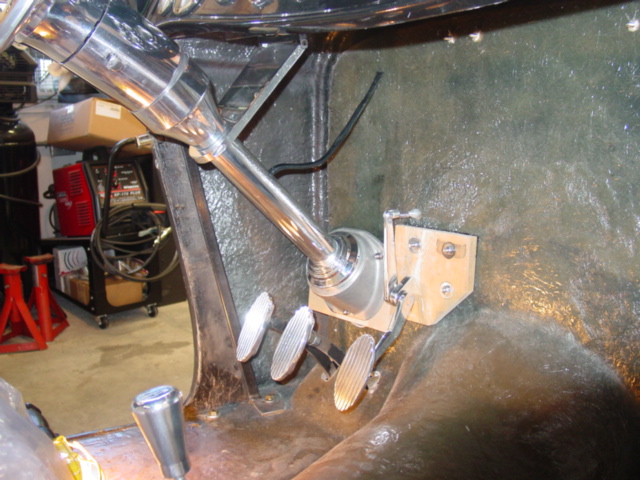
| After the Steering column, and all pedals are all installed! But the column will be back out soon, and will be a long while before it will be installed in place again. | ||
 |
 |
 |
|
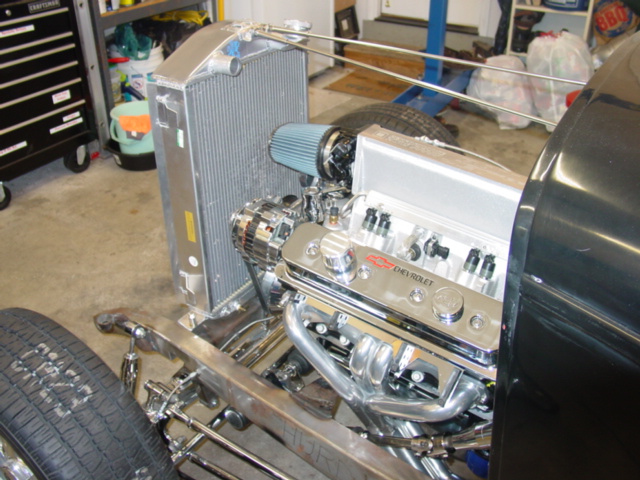
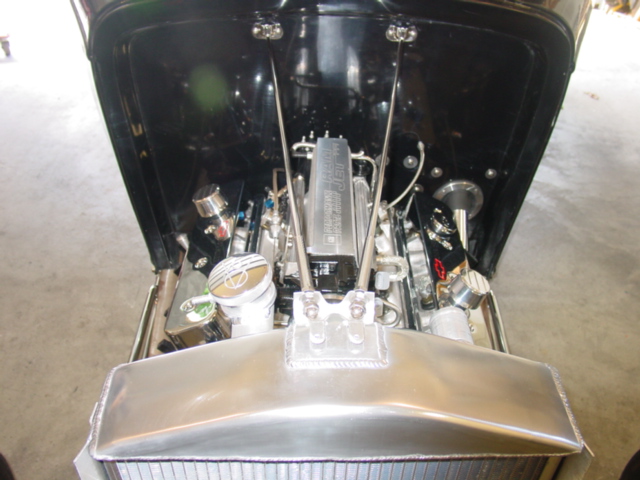
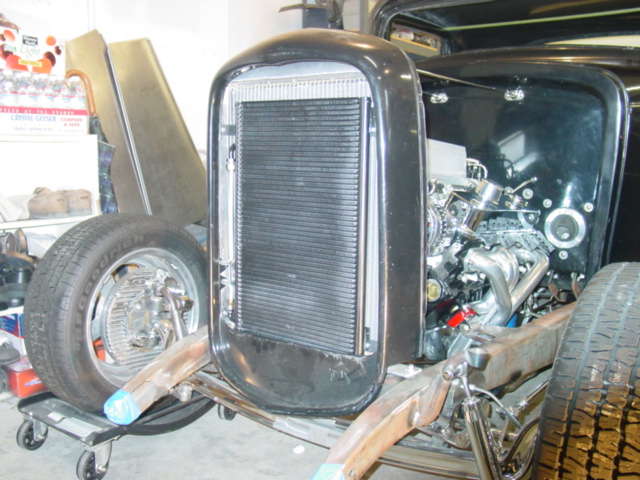
This is a good shot of the
Engine's Direct Read Fuel Pressure Gage. I've drilled and taped the RH fuel
rail, for a clean custom look. The Radiator is installed for another test fitting. |
||
 |
 |
 |
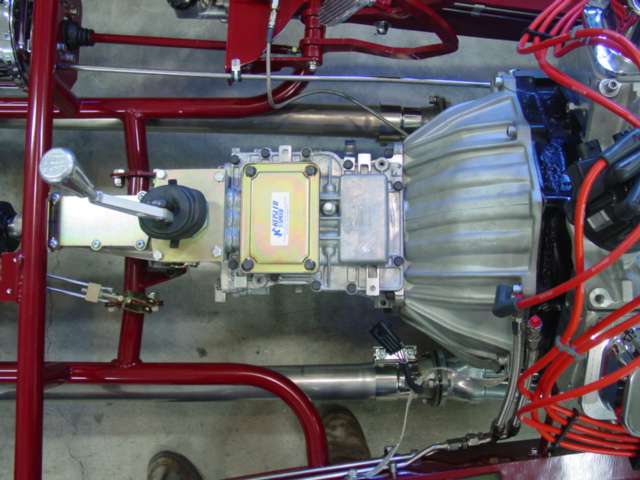
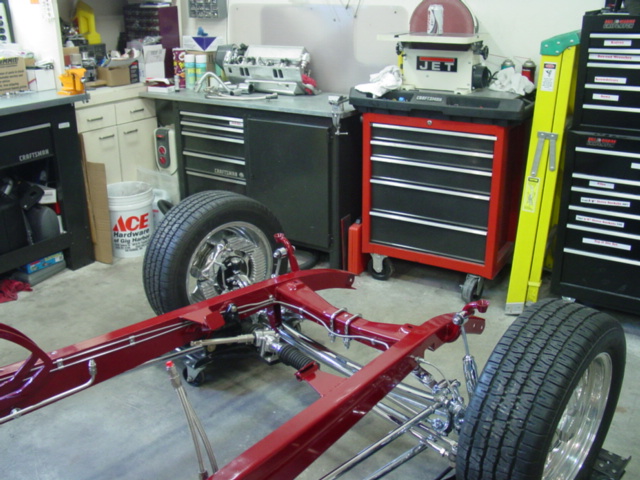
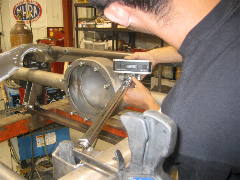
| Left is the Mono rack and pinion steering unit. Header's installed for one of many test fittings. Again the billet 5 speed stick. | ||
 |
 |
 |
| The 5 speed lever shifter in for a test fit as well. | ||
 |
 |
 |
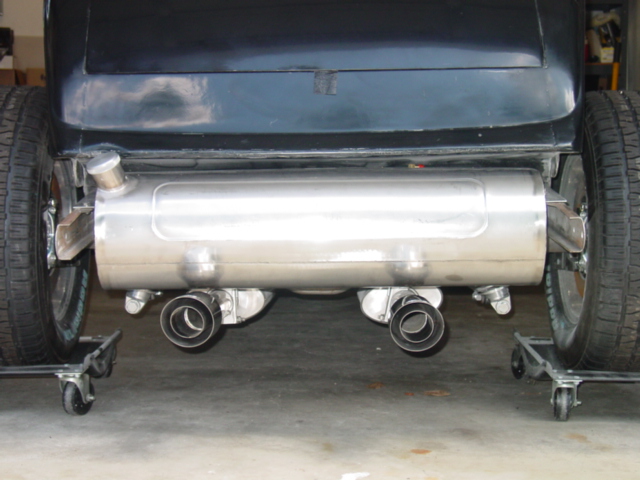
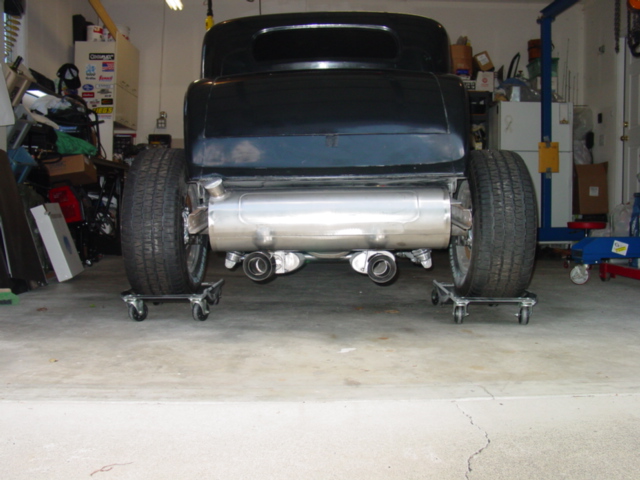
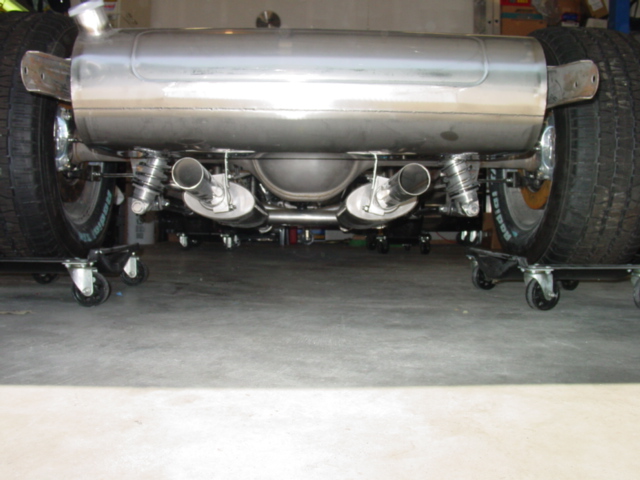
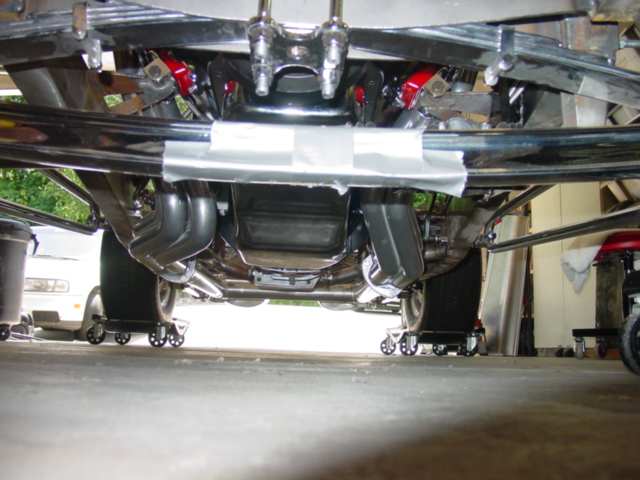
| Exhaust System test fitting for clearances from the frame & under the fuel tank. | ||
 |
 |
 |
| The steering linkage is all completed, and a final check with the header's in to double check, to confirm clearances. | ||
 |
 |
 |
| Header's first test fitting check | ||
 |
 |
 |
| Fuel system is installed and pre-leak tested with air. | ||
 |
 |
 |
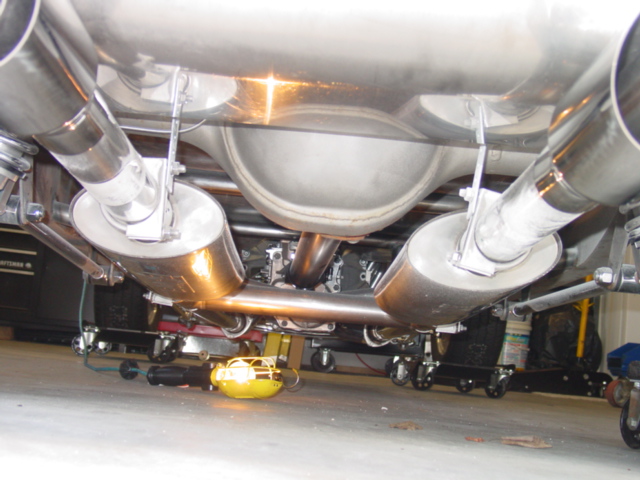
| The completed Exhaust fitting & pre-clearance testing top & back view. | ||
 |
 |
 |
| The completed Exhaust fitting & pre-clearance testing, below view. | ||
 |
 |
 |
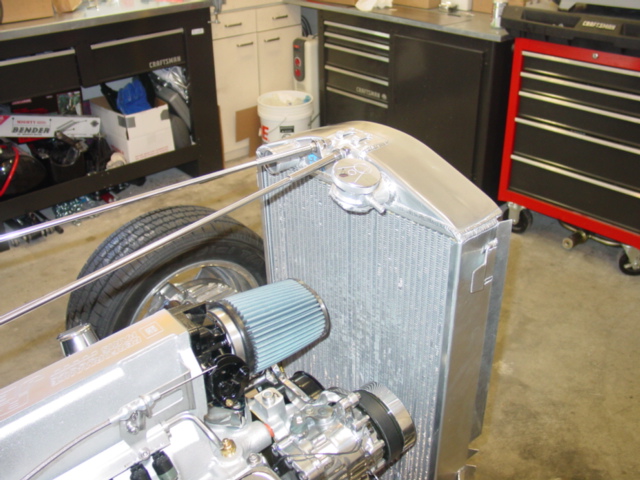
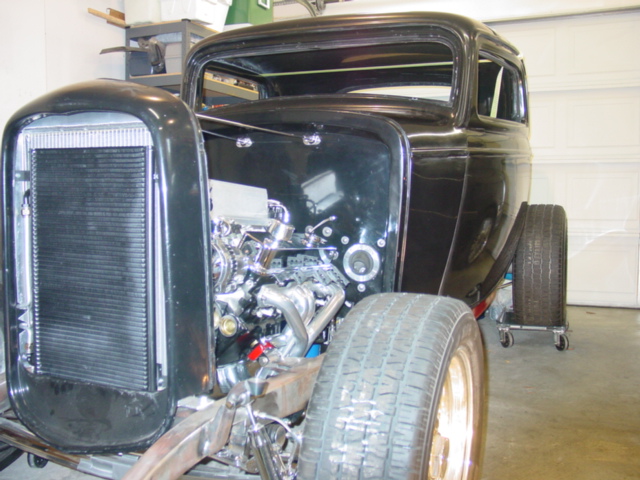
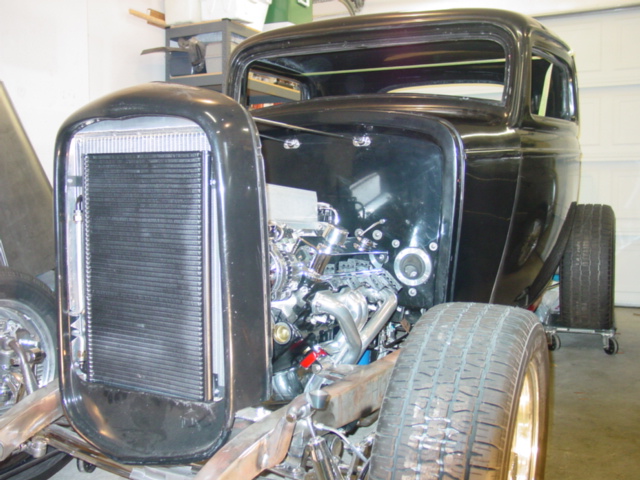
| Body is back on to install the radiator support rods: | ||
 |
 |
 |
| The Radiator & it's support rod's are all completed. | ||
 |
 |
 |
|
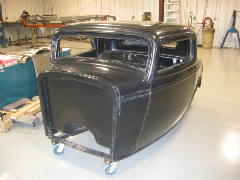
Welcome aboard! |
||
 |
 |
 |
|
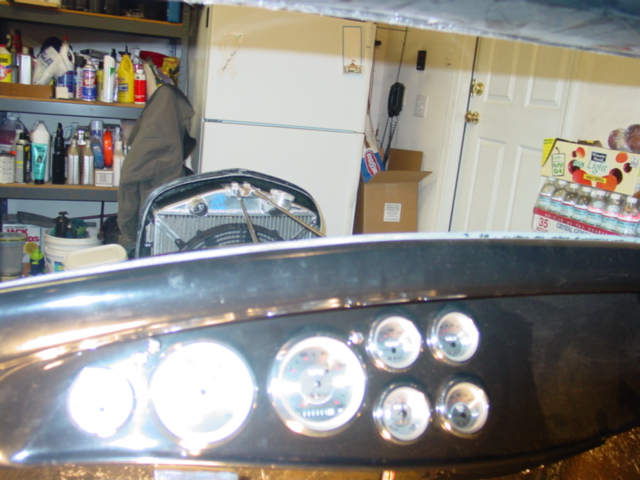
The too Cool American Classic
Gages are ready to roll! From Left to Right & Top down: Fuel Gage, Engine RPM, Speedometer, Water Temp, Volts, Vacuum/Boost, & Oil Pres. |
||
 |
 |
 |
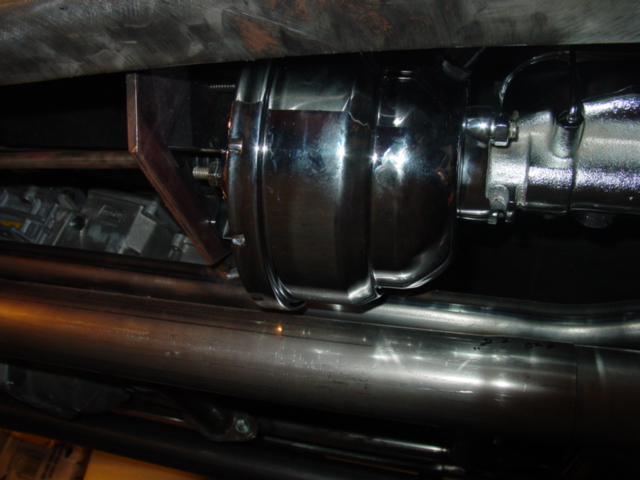
| The Heater & A/C unit is installed under the dash | ||
 |
 |
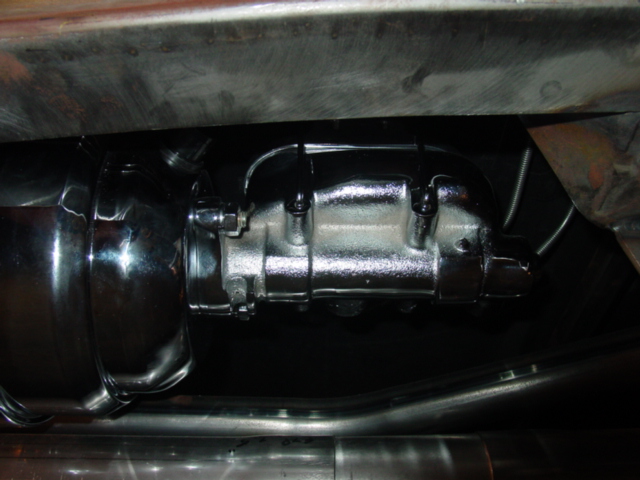 |
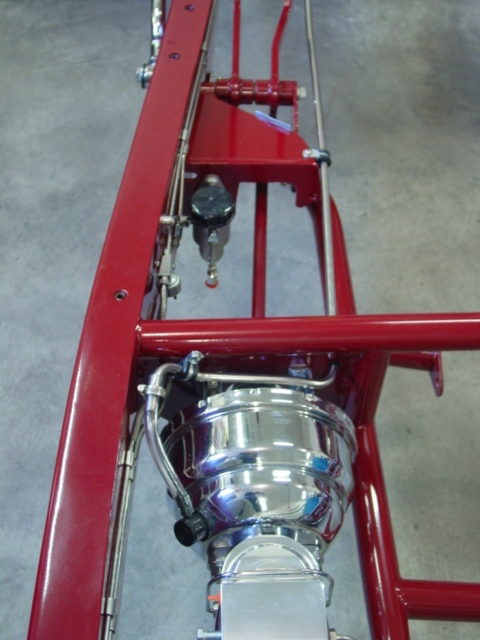
| The Brake booster is in! | ||
 |
 |
 |
| A view through the back window | ||
 |
 |
 |
|
Here the Electric radiator
fan is in for clearance & fit. The original air cleaner is also installed.
Above the Original Ram Jet 350 from Sallee Chevrolet, down in Milton Freewater, Oregon. (Now Gilbert
Chevrolet) Also shown is the Billet Specialties Tru Trac Serpentine System, which is on for the first of many many test fittings. |
||
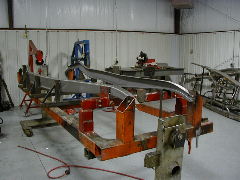
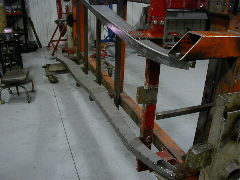
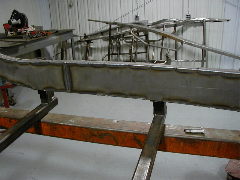
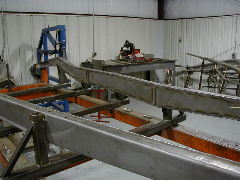
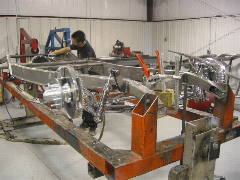
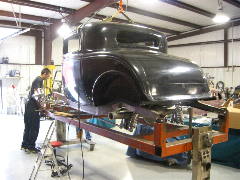
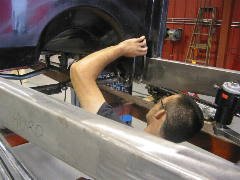
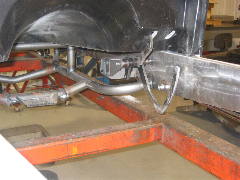
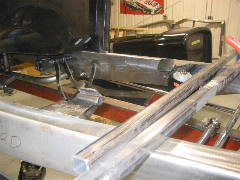
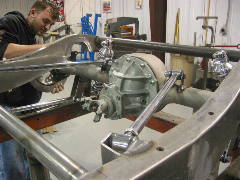
The
initial build of the custom 32 frame at Street Rod's by Michael, in his shop
back in Shelbyville, Tennessee.
(Sept / Oct 2004)
 |
 |
 |
 |
 |
 |
 |
 |
 |
 |
 |
 |
 |
 |
 |
 |
 |
 |
 |
 |
 |
 |
 |
 |
 |
 |
 |
 |
 |
 |
 |
 |
 |
 |
 |
 |
![]()
Page Design by Dave
Hurd
J & D Aero Inc.
Small Kitty productions 2018
J & D Powder Coating - contact:
44DQR